W02E01 | Cut-up 1
Listen
Leave a voice message for the show!
Subscribe
Subscribe to Scripted Design on your favourite podcast platform:
Spotify Apple Podcasts Google Podcasts Breaker Pocket Casts Anchor.fm RadioPublic Castbox RSS
Download random audio file
Today’s task involves downloading a random audio file from the ones that were uploaded last week. Click the button below to download a random file (it will download a new file each time you click).
Download random instruction file
Transcript
Hello. Welcome to week two, day one of Scripted Design. This week we’re going to be working around ideas of cut up.
To start, as we always do, I’d like you to do a free-write write for five minutes on the subject of re-ordering. Re-ordering, five minutes, starting….now!
[5 minutes]
[sound]
Welcome back. How are the free-writes going for you? Is this something you’re enjoying, something you love doing, something you hate? Or have you written something or realised something you really want to share? Please do let me know - you can leave a voice message by following the link in the show notes.
Now, we’re going to be using voices of people on this course for our own creative exercise. Now, the main creative exercise of the day. This is one that requires you to go to the Scripted Design website. If you go to the website, and the page for today’s show, Week 2, Episode 1, there is a special section at the top of the page which will allocate you a random audio file from all of the audio file listeners made last week, ready for downloading.
Your task today is to download one file, and make a ten-second film to accompany the audio instruction. That means you will have to open up video editing software, create a new scene or composition that’s 10 seconds long, import the audio file you downloaded, and shoot and import some new visual footage to accompany the soundtrack, and export your new composition.
Then please upload the footage to our shared drive - there’s a link in the show notes.
If you’ve edited videos before, and know how to do what I just described, then great! You can stop listening now, and go and do the task. If you haven’t edited videos before, there is a tutorial for Adobe Premiere Pro, and Da Vinci Resolve, which is a free high-powered video editor. I would love to include more tutorials for different software, but these are the two platforms that I currently use. If you use something else, you’ll have to find some tutorials online. Those steps again:
- Download the audio file from the Situated Design website, 2021, Week 2 Episode [link]](#download-random-audio-file).
- Create a new composition or scene, ten seconds in length.
- Import the audio file you downloaded into that scene, making sure it fits into the ten second length. There should be a couple of seconds’ silence at either end, so bear this in mind when you’re composing your film.
- Shoot some footage that you feel is appropriate for the audio composition, using your camera or phone.
- Import this new video footage into the composition, but remove the audio track. This means that you should be able to see your video, but hear the sound file you downloaded.
- Edit the film to be 10 seconds long.
- Export the new film, and upload it via the link on the Scripted Design website.
Good luck with this task - and I’m looking forward to seeing what you create!
Upload your work
How to cut and export films
Here are instructions for cutting audio and video in Adobe Premiere Pro and Da Vinci Resolve. Premiere Pro is proprietary software which requires a subscription to use, and is made by Adobe. If you’re a student you may be eligible for a reduction, but it can still cost a lot of money if you’re not going to use it all the time. If this is an issue, use DaVinci Resolve – it’s free, and does everything that the Adobe software does.
Da Vinci Resolve is proprietary software, but it’s free to use! It’s made by BlackMagic, the company who make lots of cameras used in film and TV production. There is a paid version, but the free version has all the features you’d need to edit, grade, and export feature-length films, so it’s good to use here. The only downside is that it’s a bit of a memory-hog, so if your computer is a bit slow, you might be waiting a while for things to happen. Fortunately the instructions below have every step you need. :)
Adobe Premiere Pro
If you’re new to Premiere Pro, I’d recommend familiarising yourself with the interface through this brief tutorial. It covers most of the things we’re going to be doing here. Once you’ve done that (or if you’re already familiar with the interface), follow these steps:
- Download an audio file from the Scripted Design website here
- Open Premiere Pro
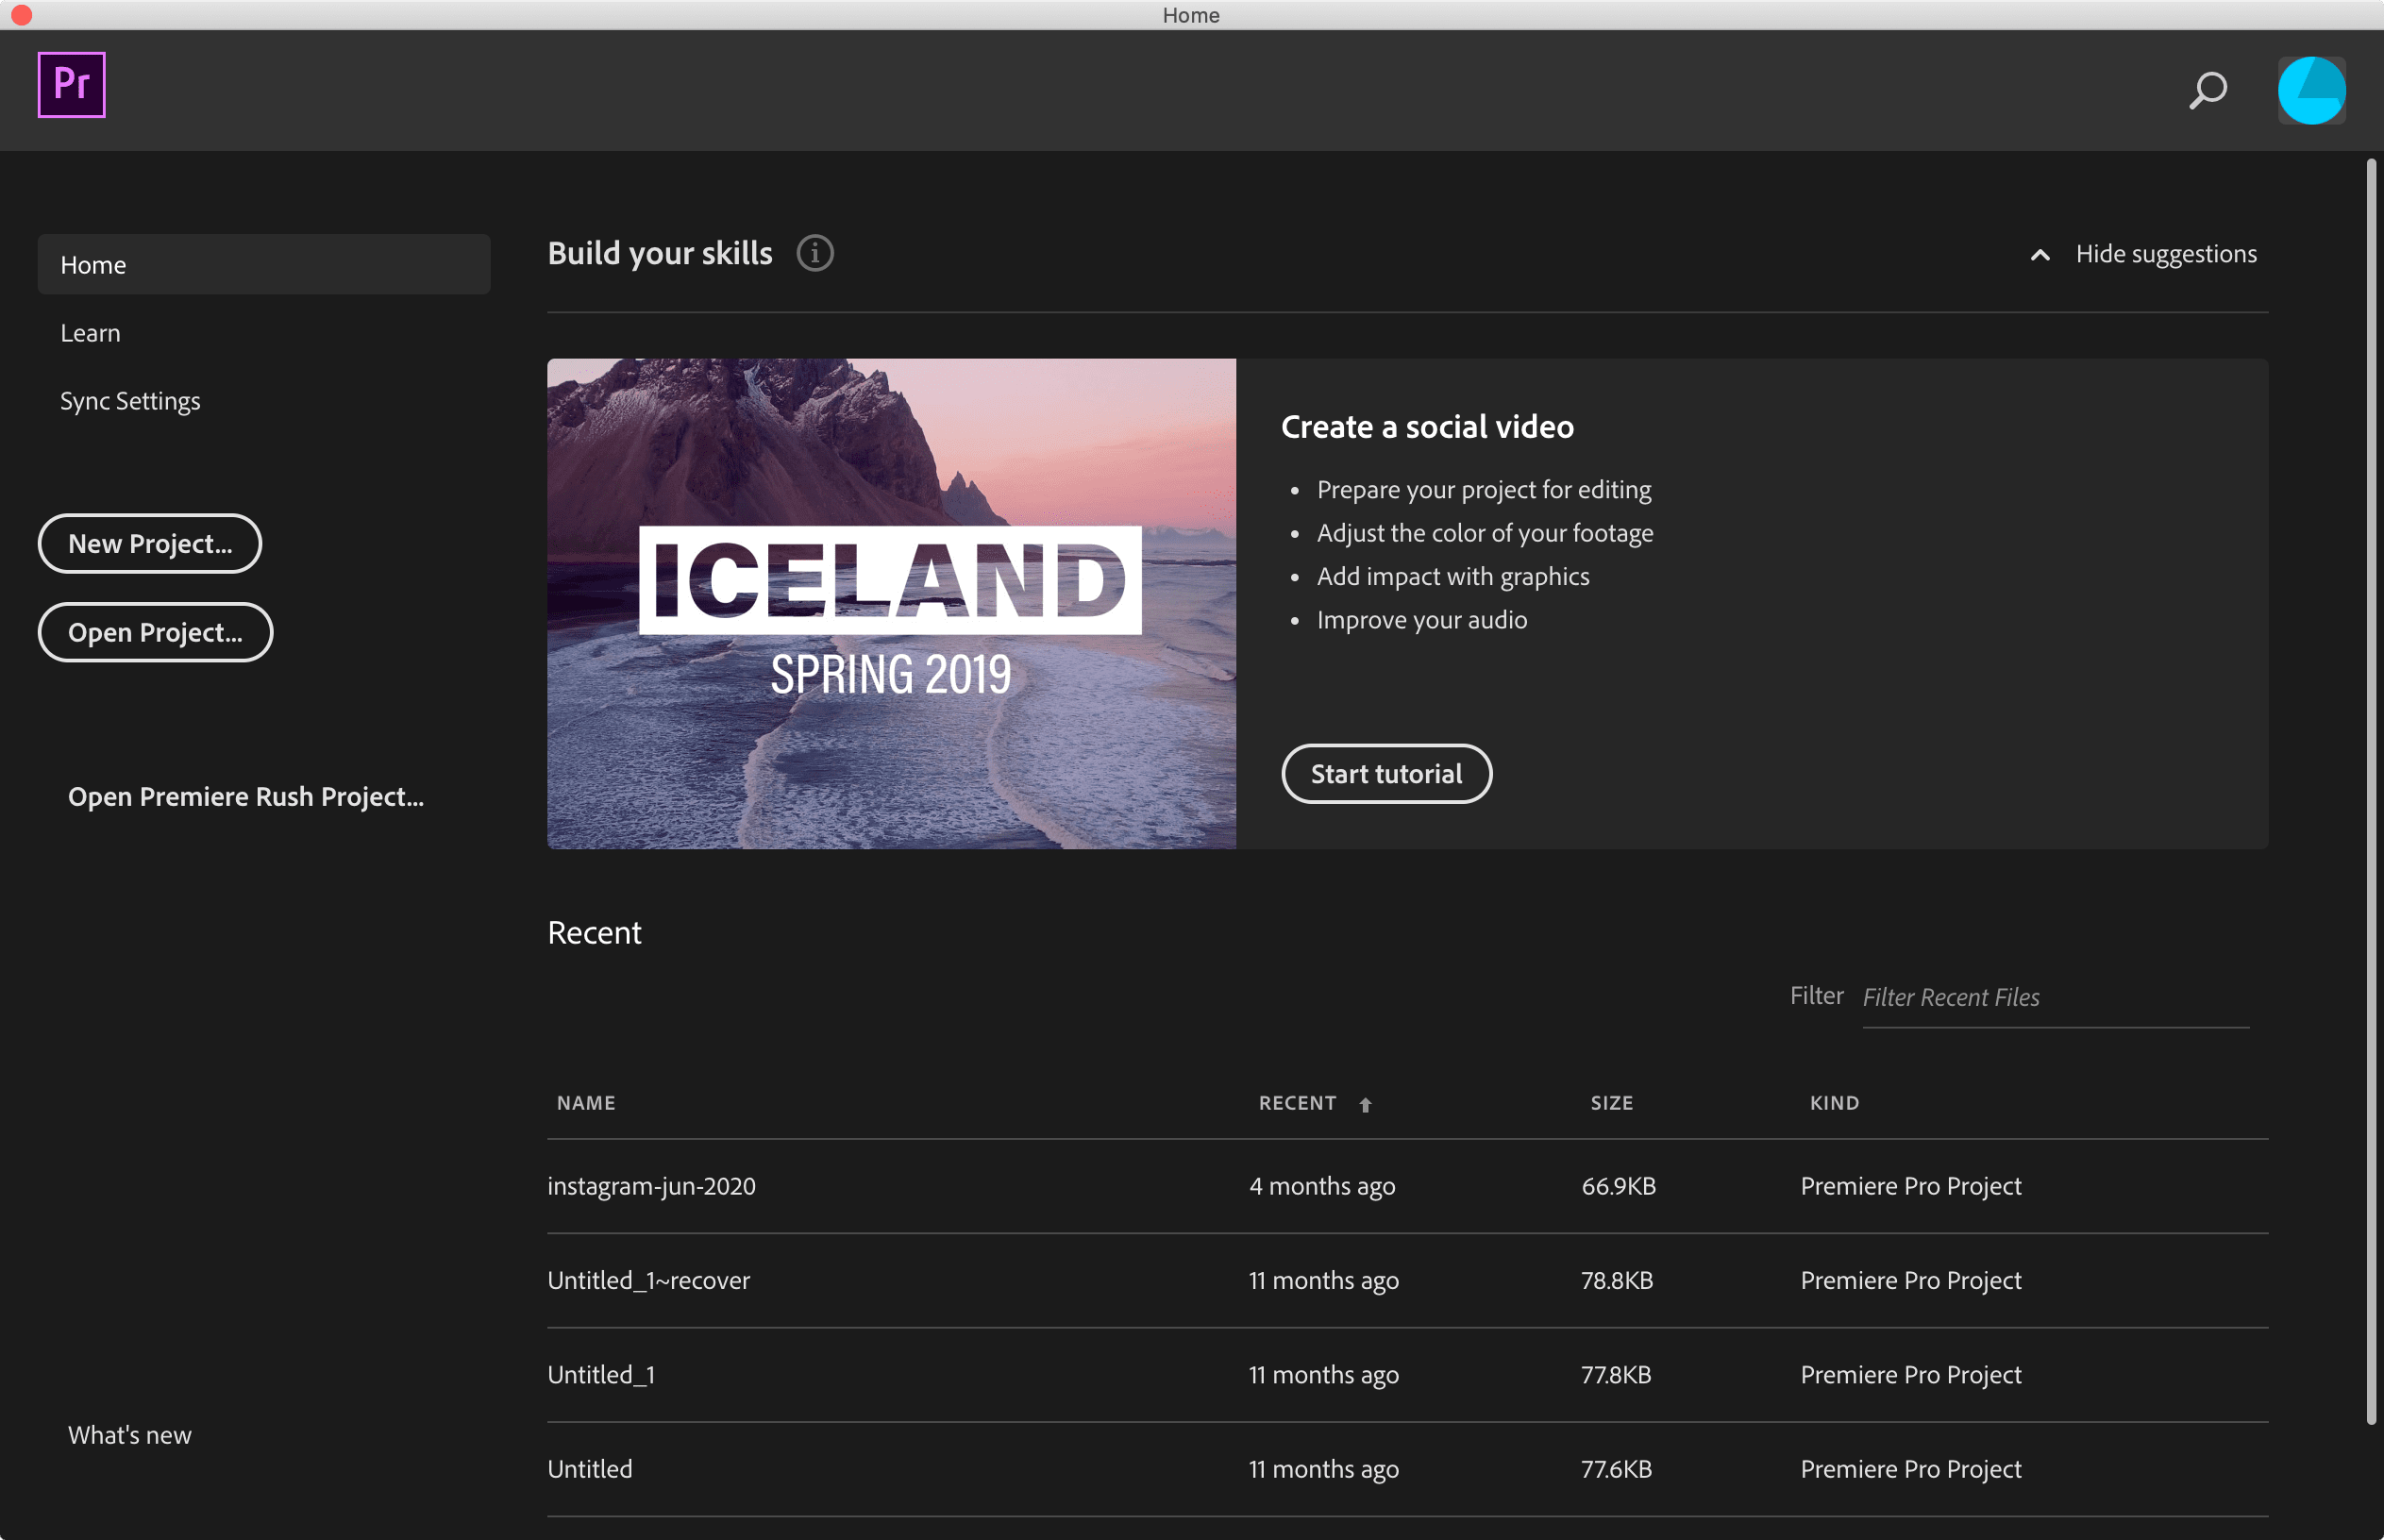
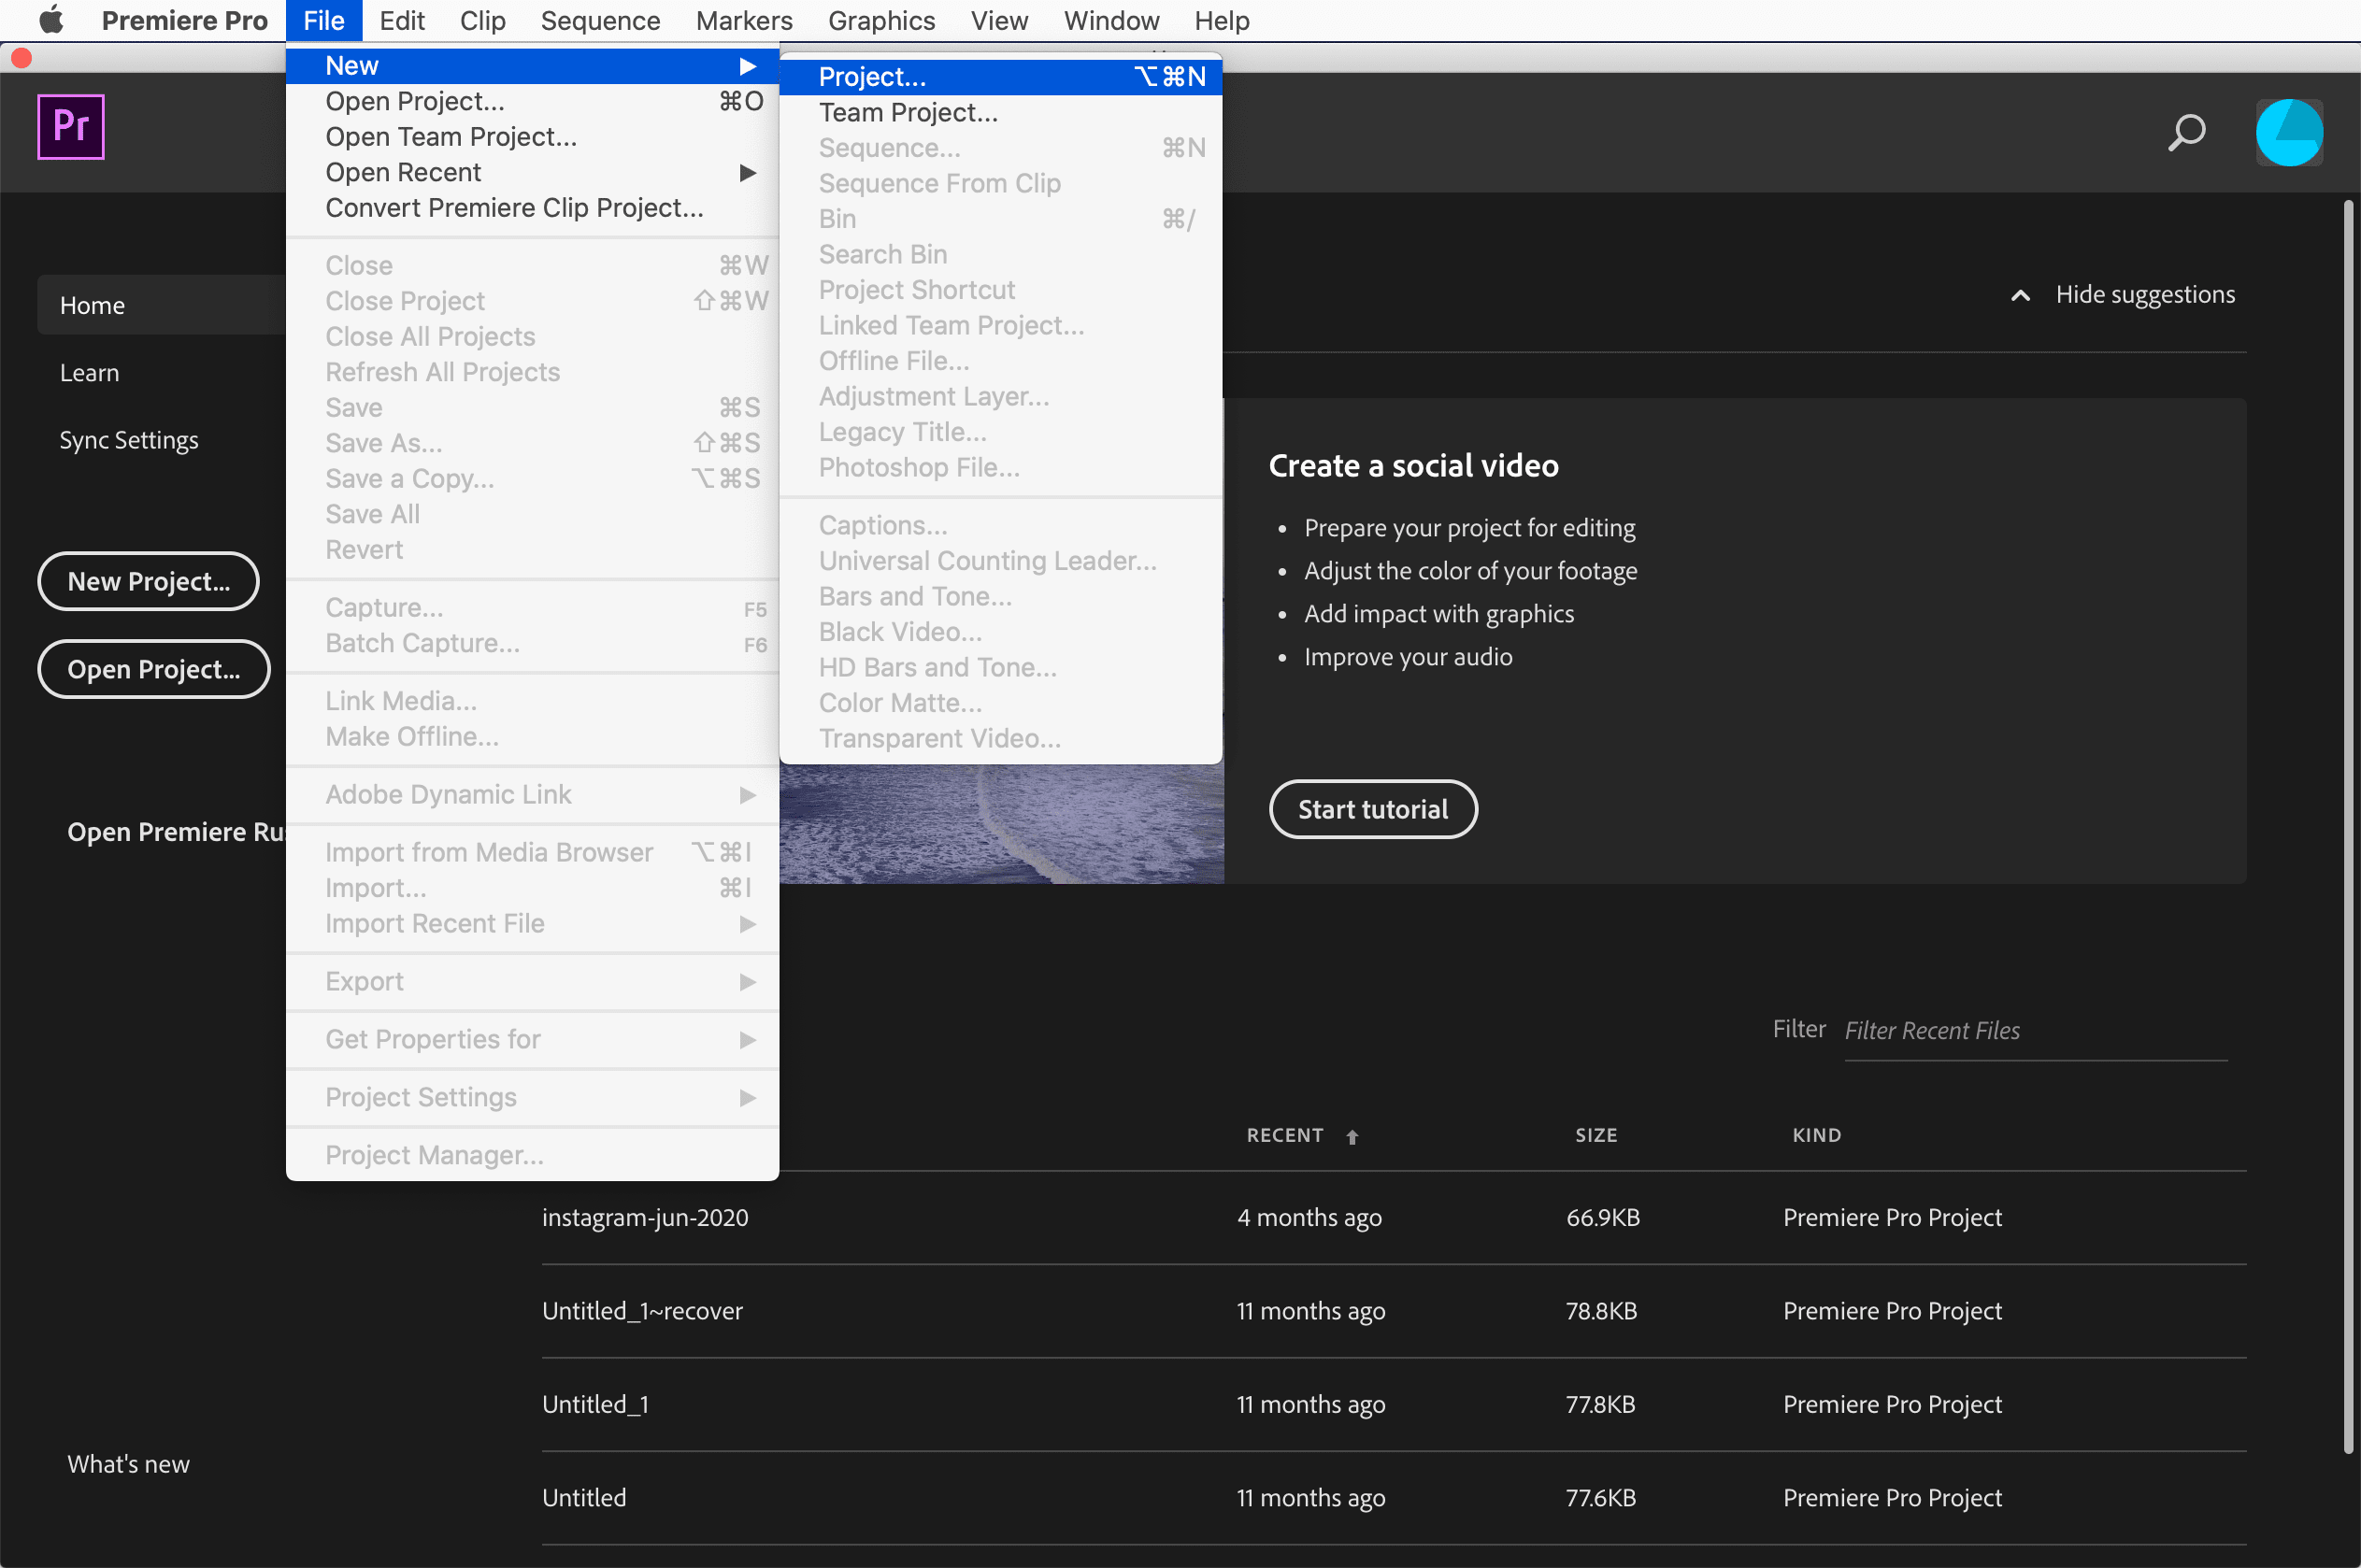
- Create a new project (File > New > New Project)
- Choose your project name and where you want to keep the project. You can choose this yourself. Make sure it’s in a place with plenty of storage space!
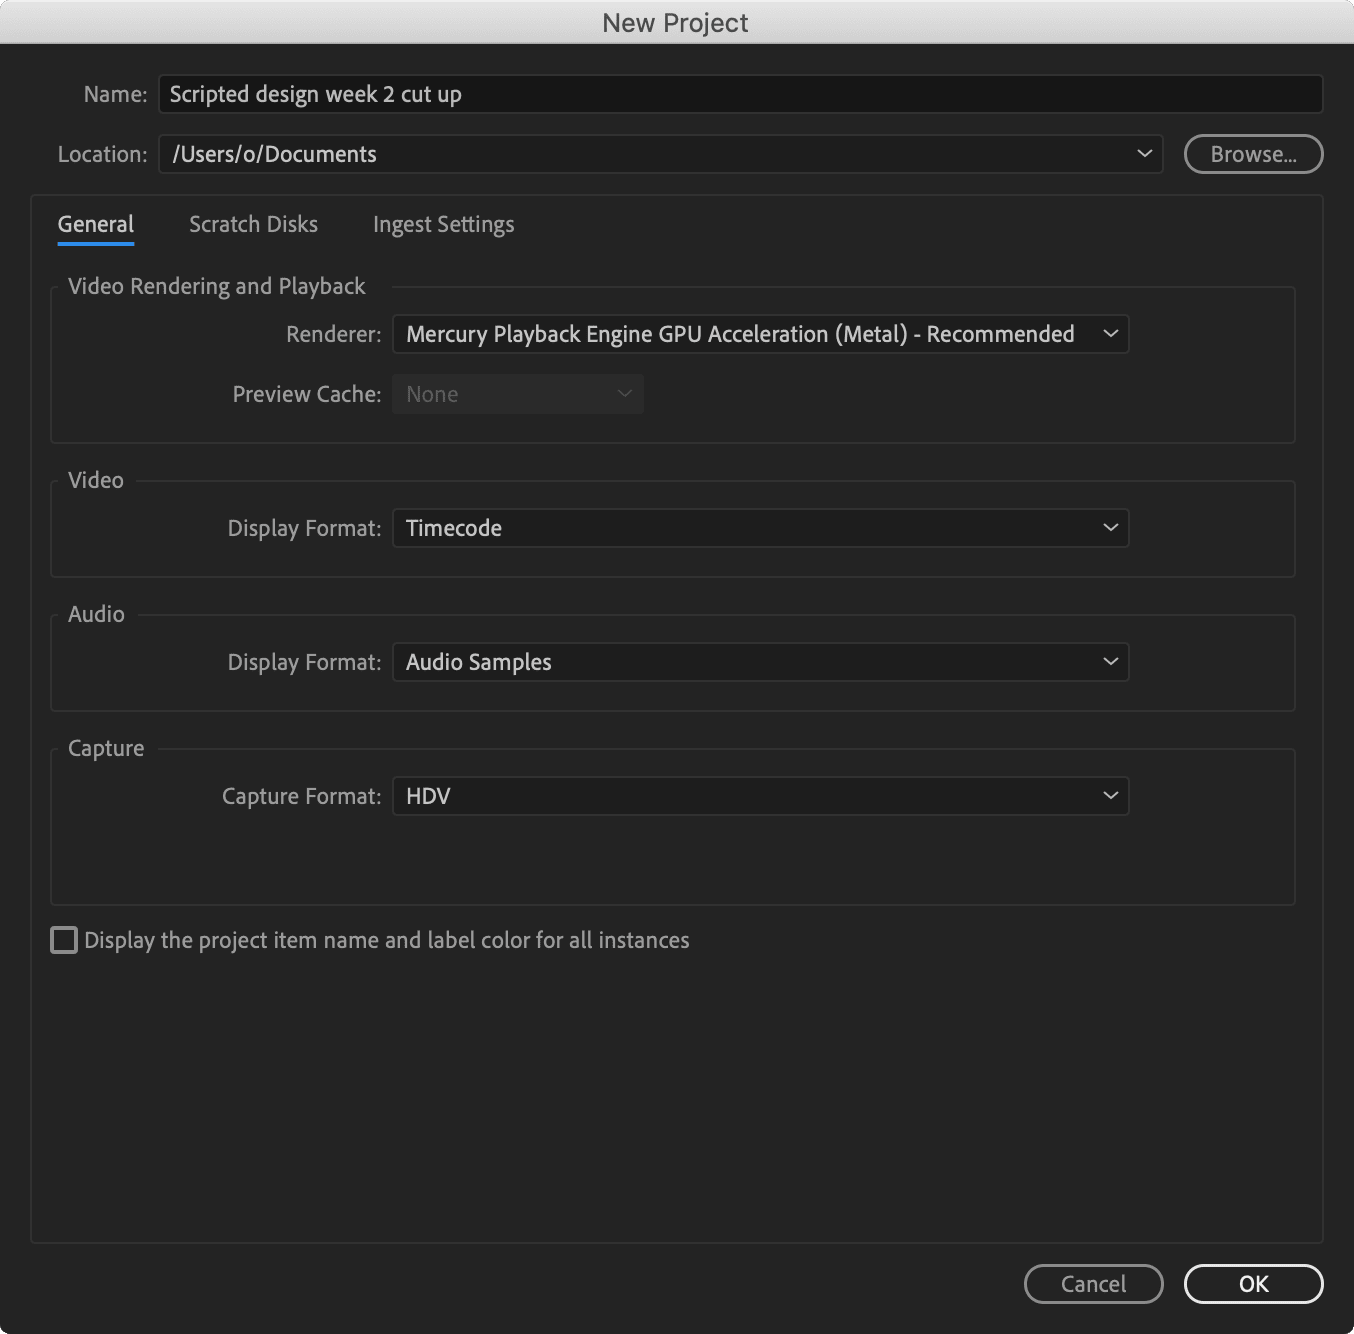 Make sure to hit “OK”!
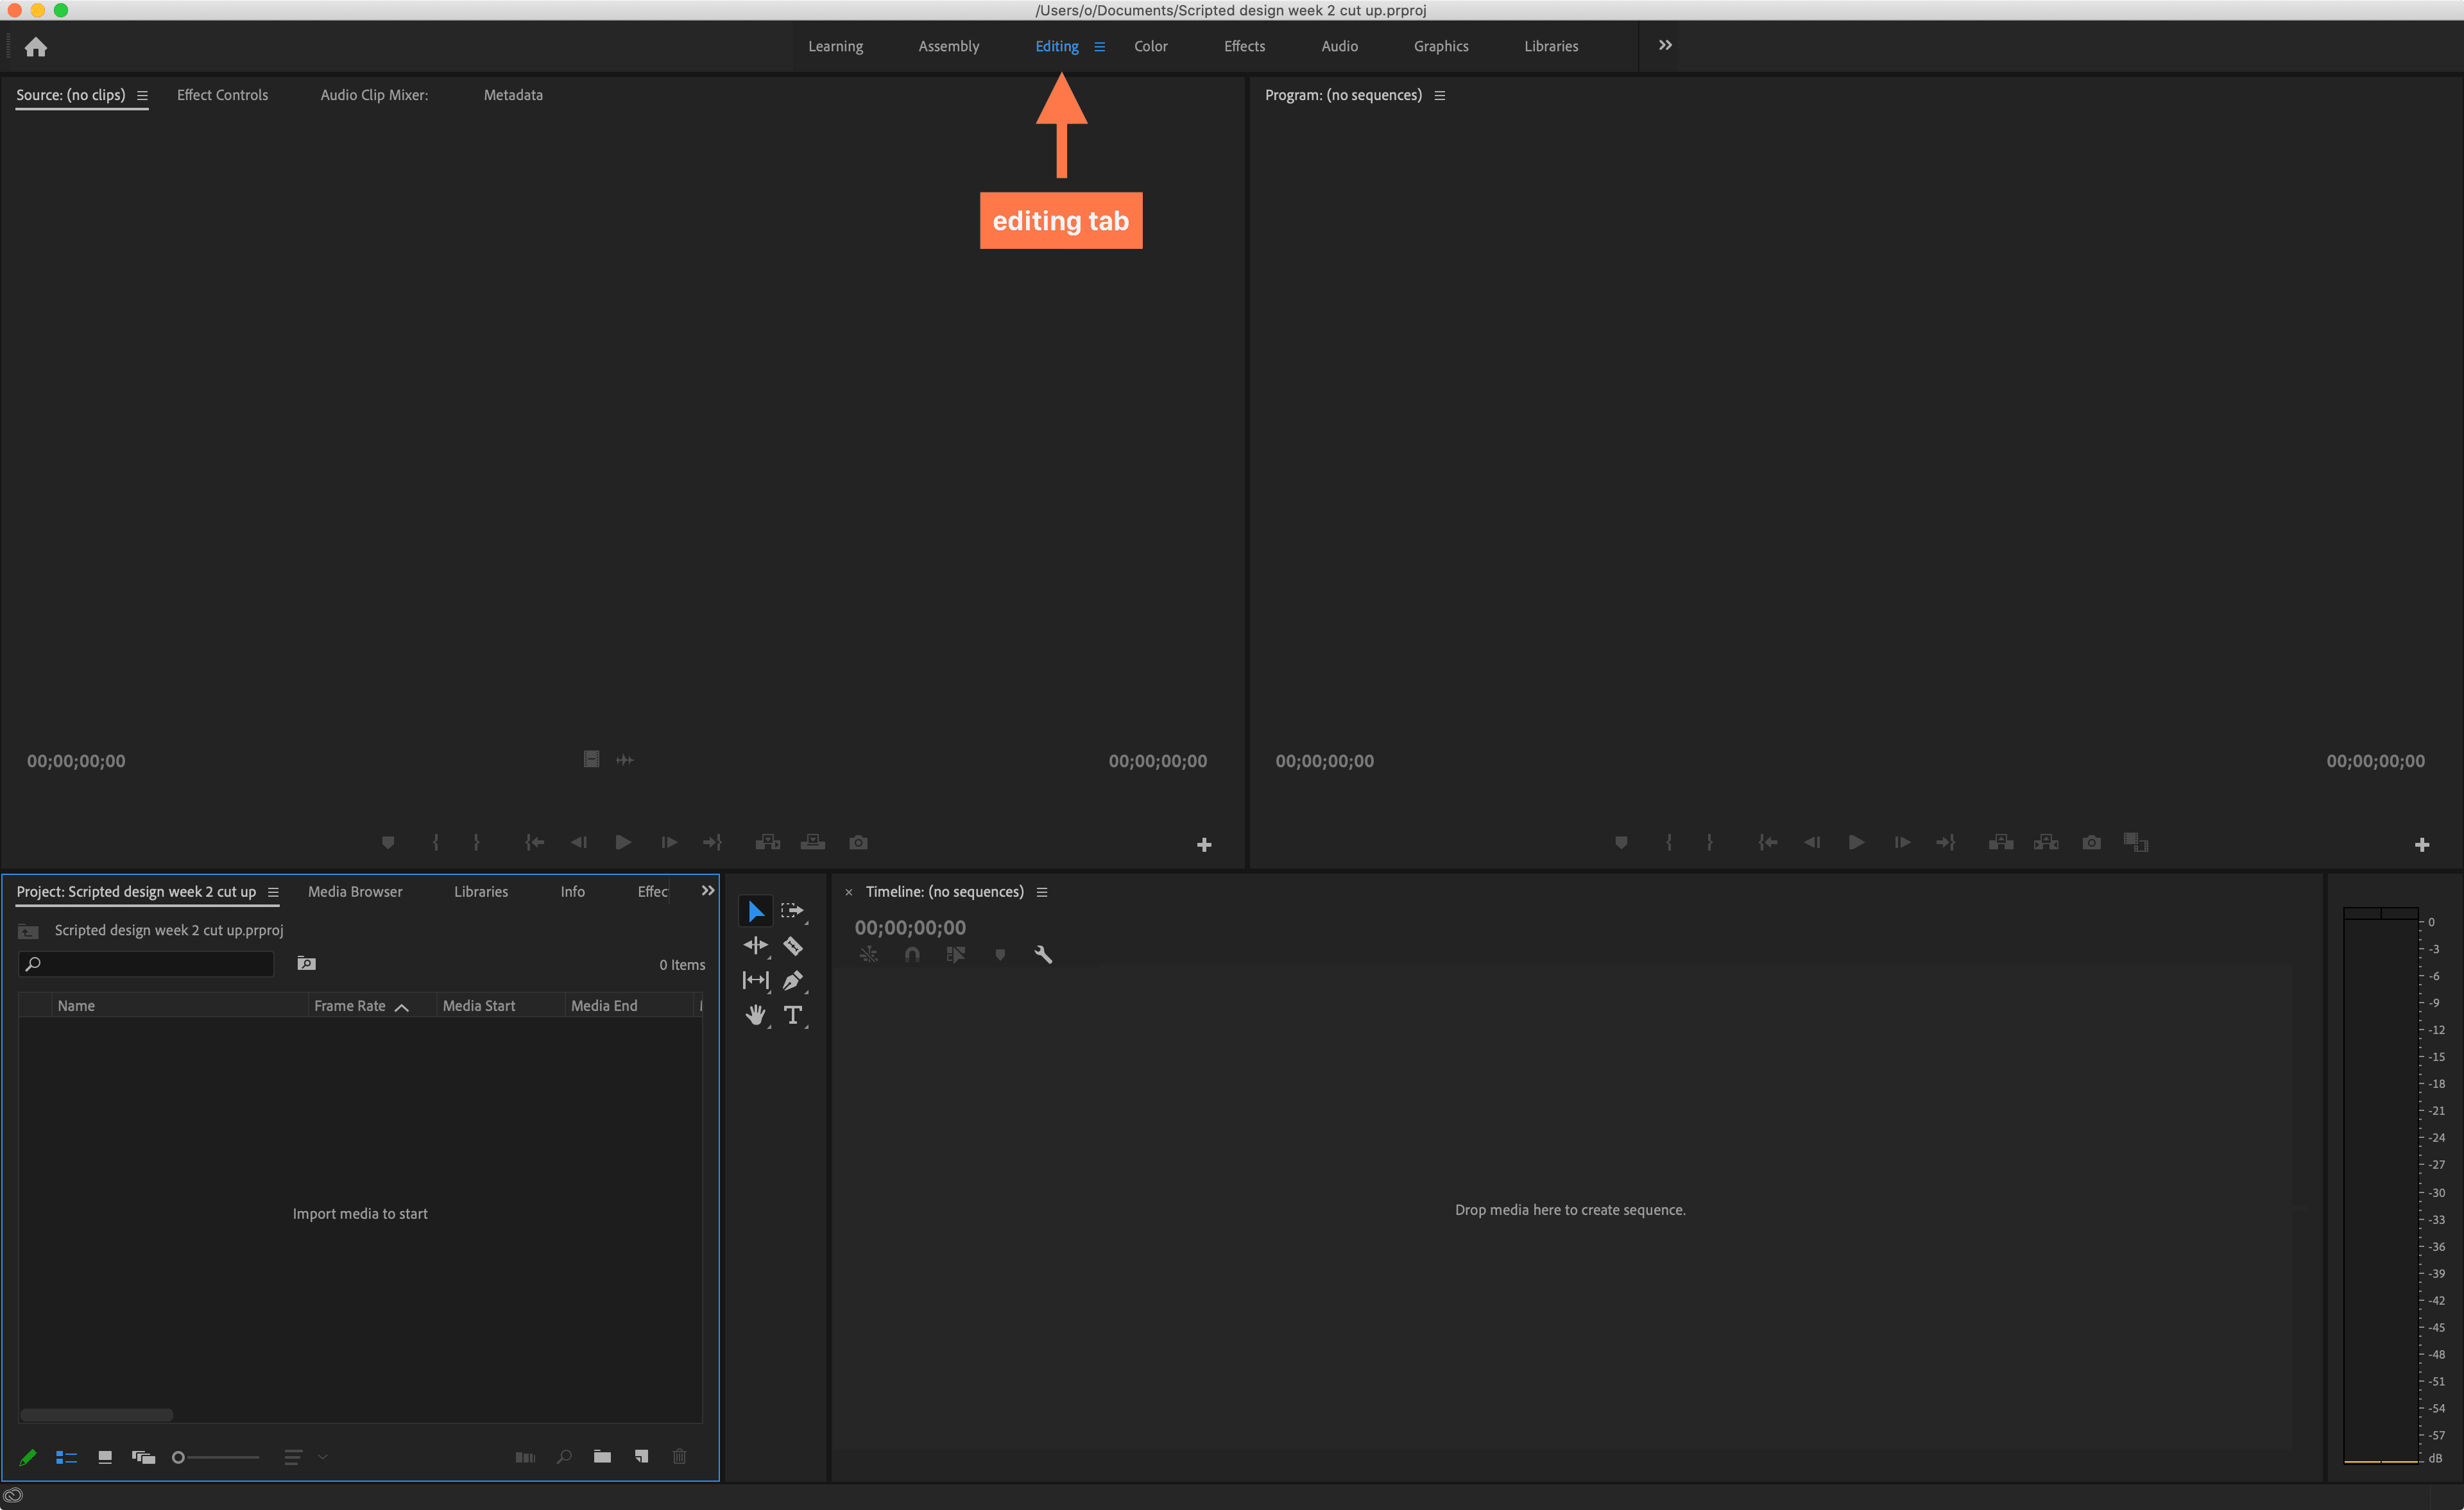
 - You should now have a window with a blank project. So that your window looks like the one in the tutorial, Click on the ‘Editing’ tab at the top:
- Import your audio file by dragging and dropping it into the ‘Media’ portion of the window. Here it’s worth noting something about the way that Premiere Pro works. Each project doesn’t fully import media, it just points at it, so if you drag and drop your audio file from your Downloads folder, each time you open this Premiere Pro project, it looks in the Downloads folder for that audio file. If the original audio file moves or is deleted or edited, it will affect the composition of your Premiere Pro project. If you want to be safe, move the audio file into the project folder, then import it to Premiere Pro.
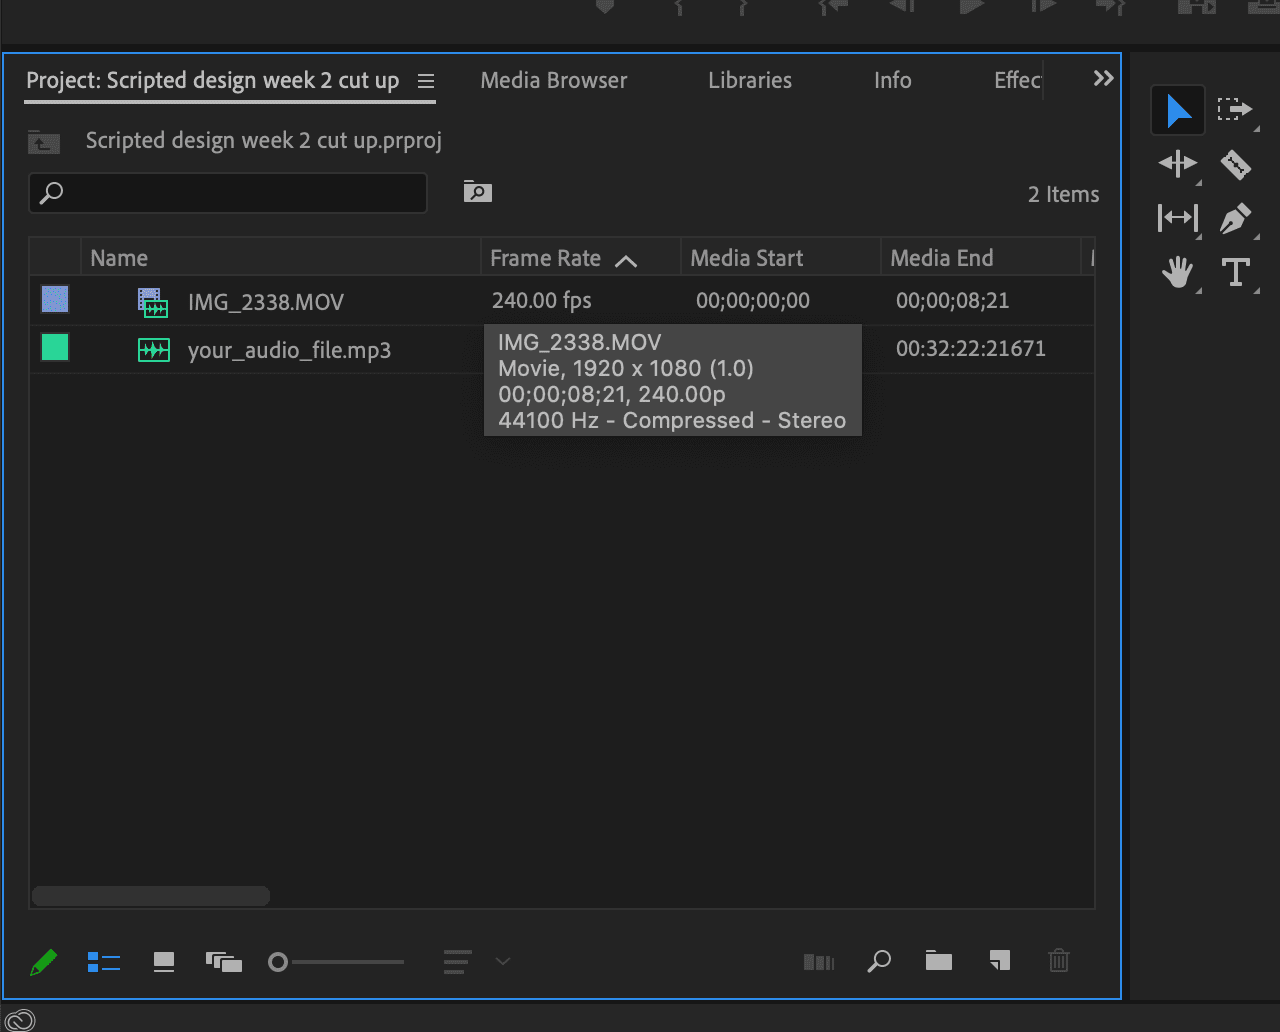
- Import your video clip(s) the same way, dragging and dropping them into the Media tab. Here, my video is a clip of a fire recorded on a phone, called IMG_2338.MOV:
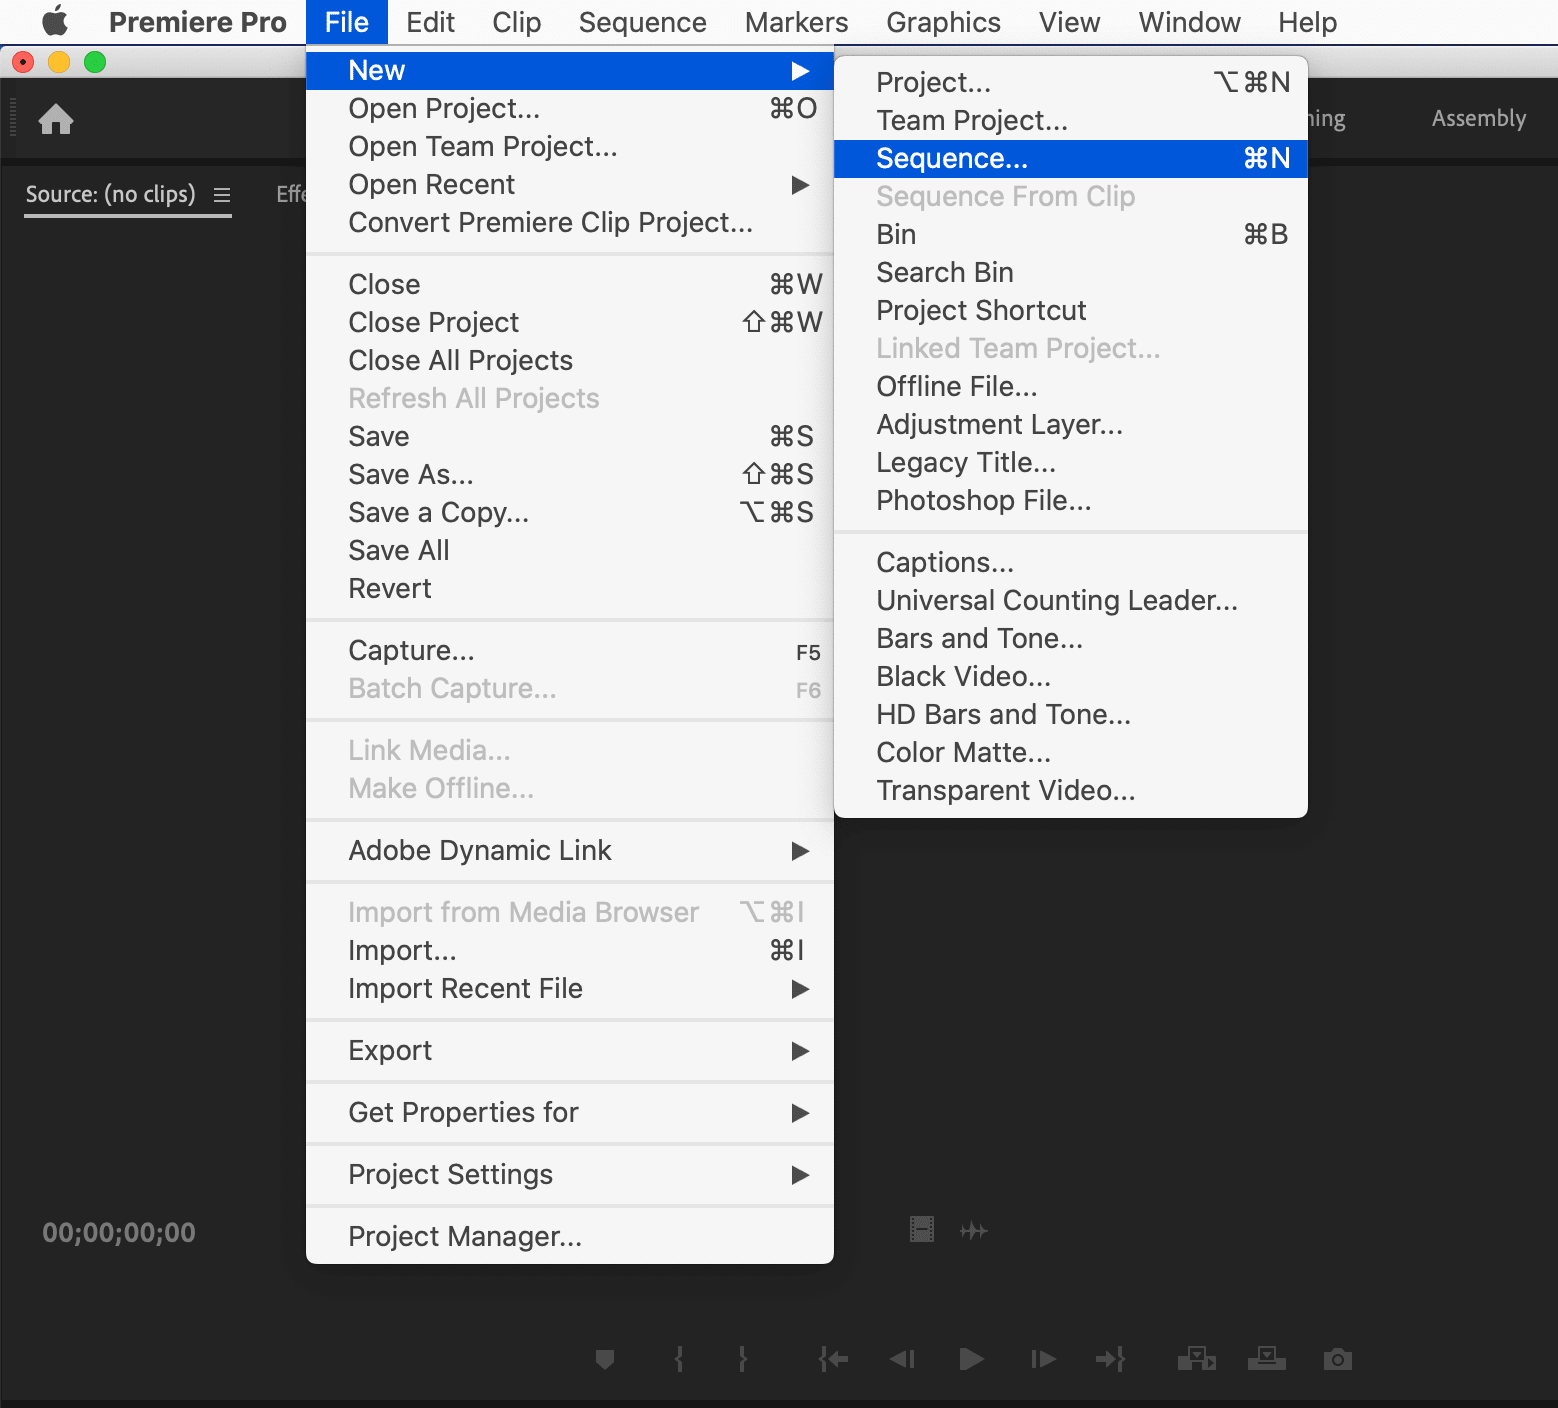
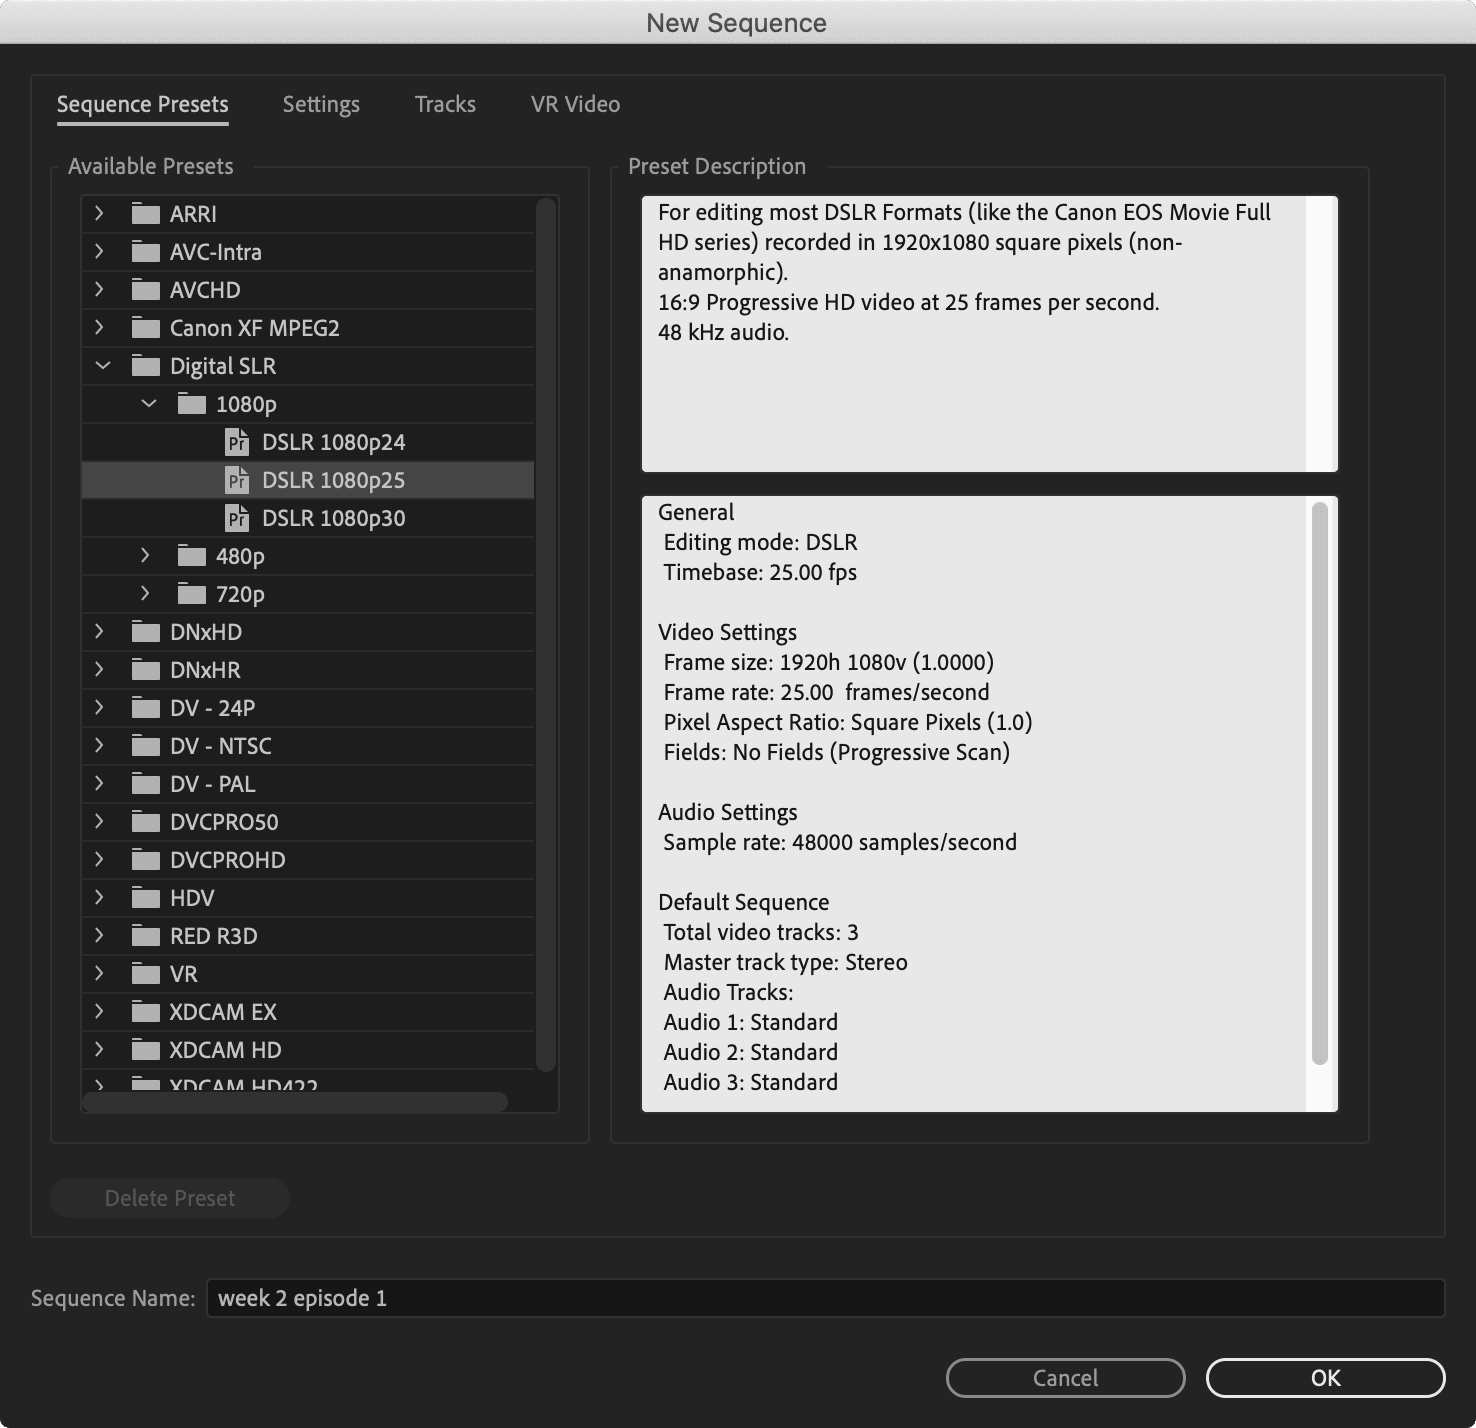
- Create a new sequence! File > New > Sequence. I’m calling mine week 2 episode 1, but name as you like. I’ve also selected the DSLR > 1080p > DSLR 1080p25 preset, because my video is shot in 25fps. If you know about this subject, change the settings all you like, but if not, go with the ones I’ve chosen.
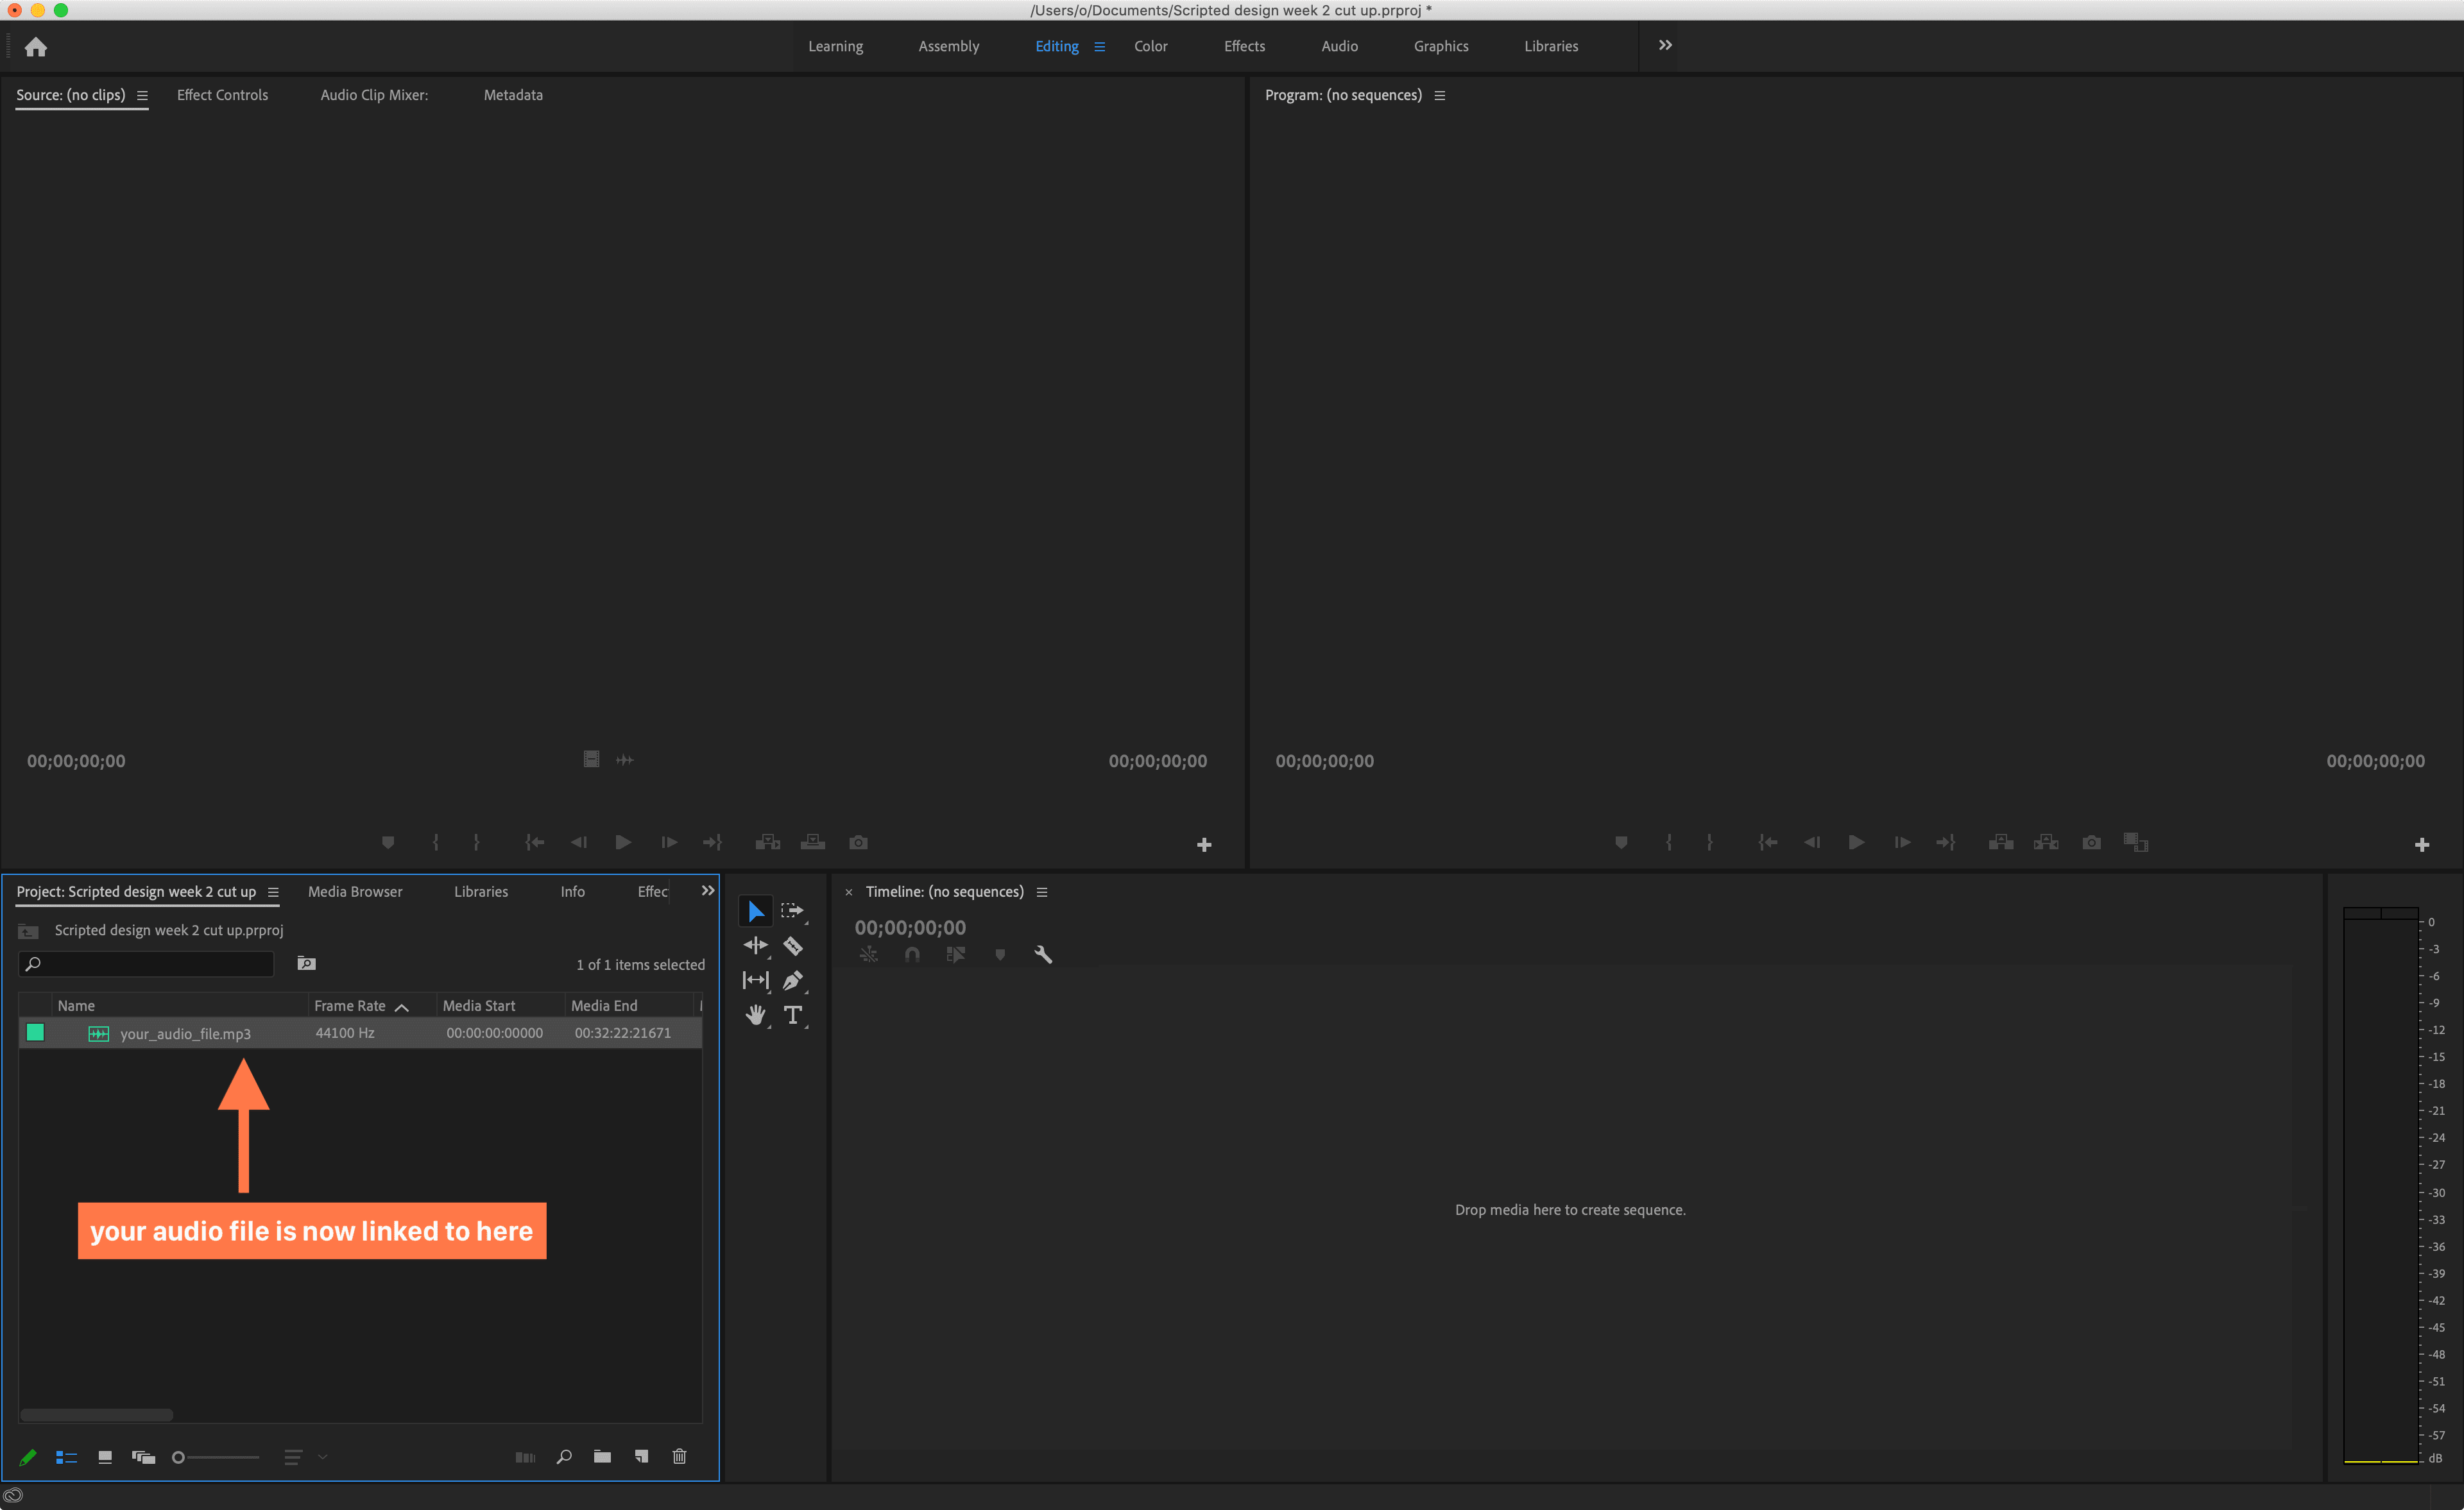
- Now you should see the following:
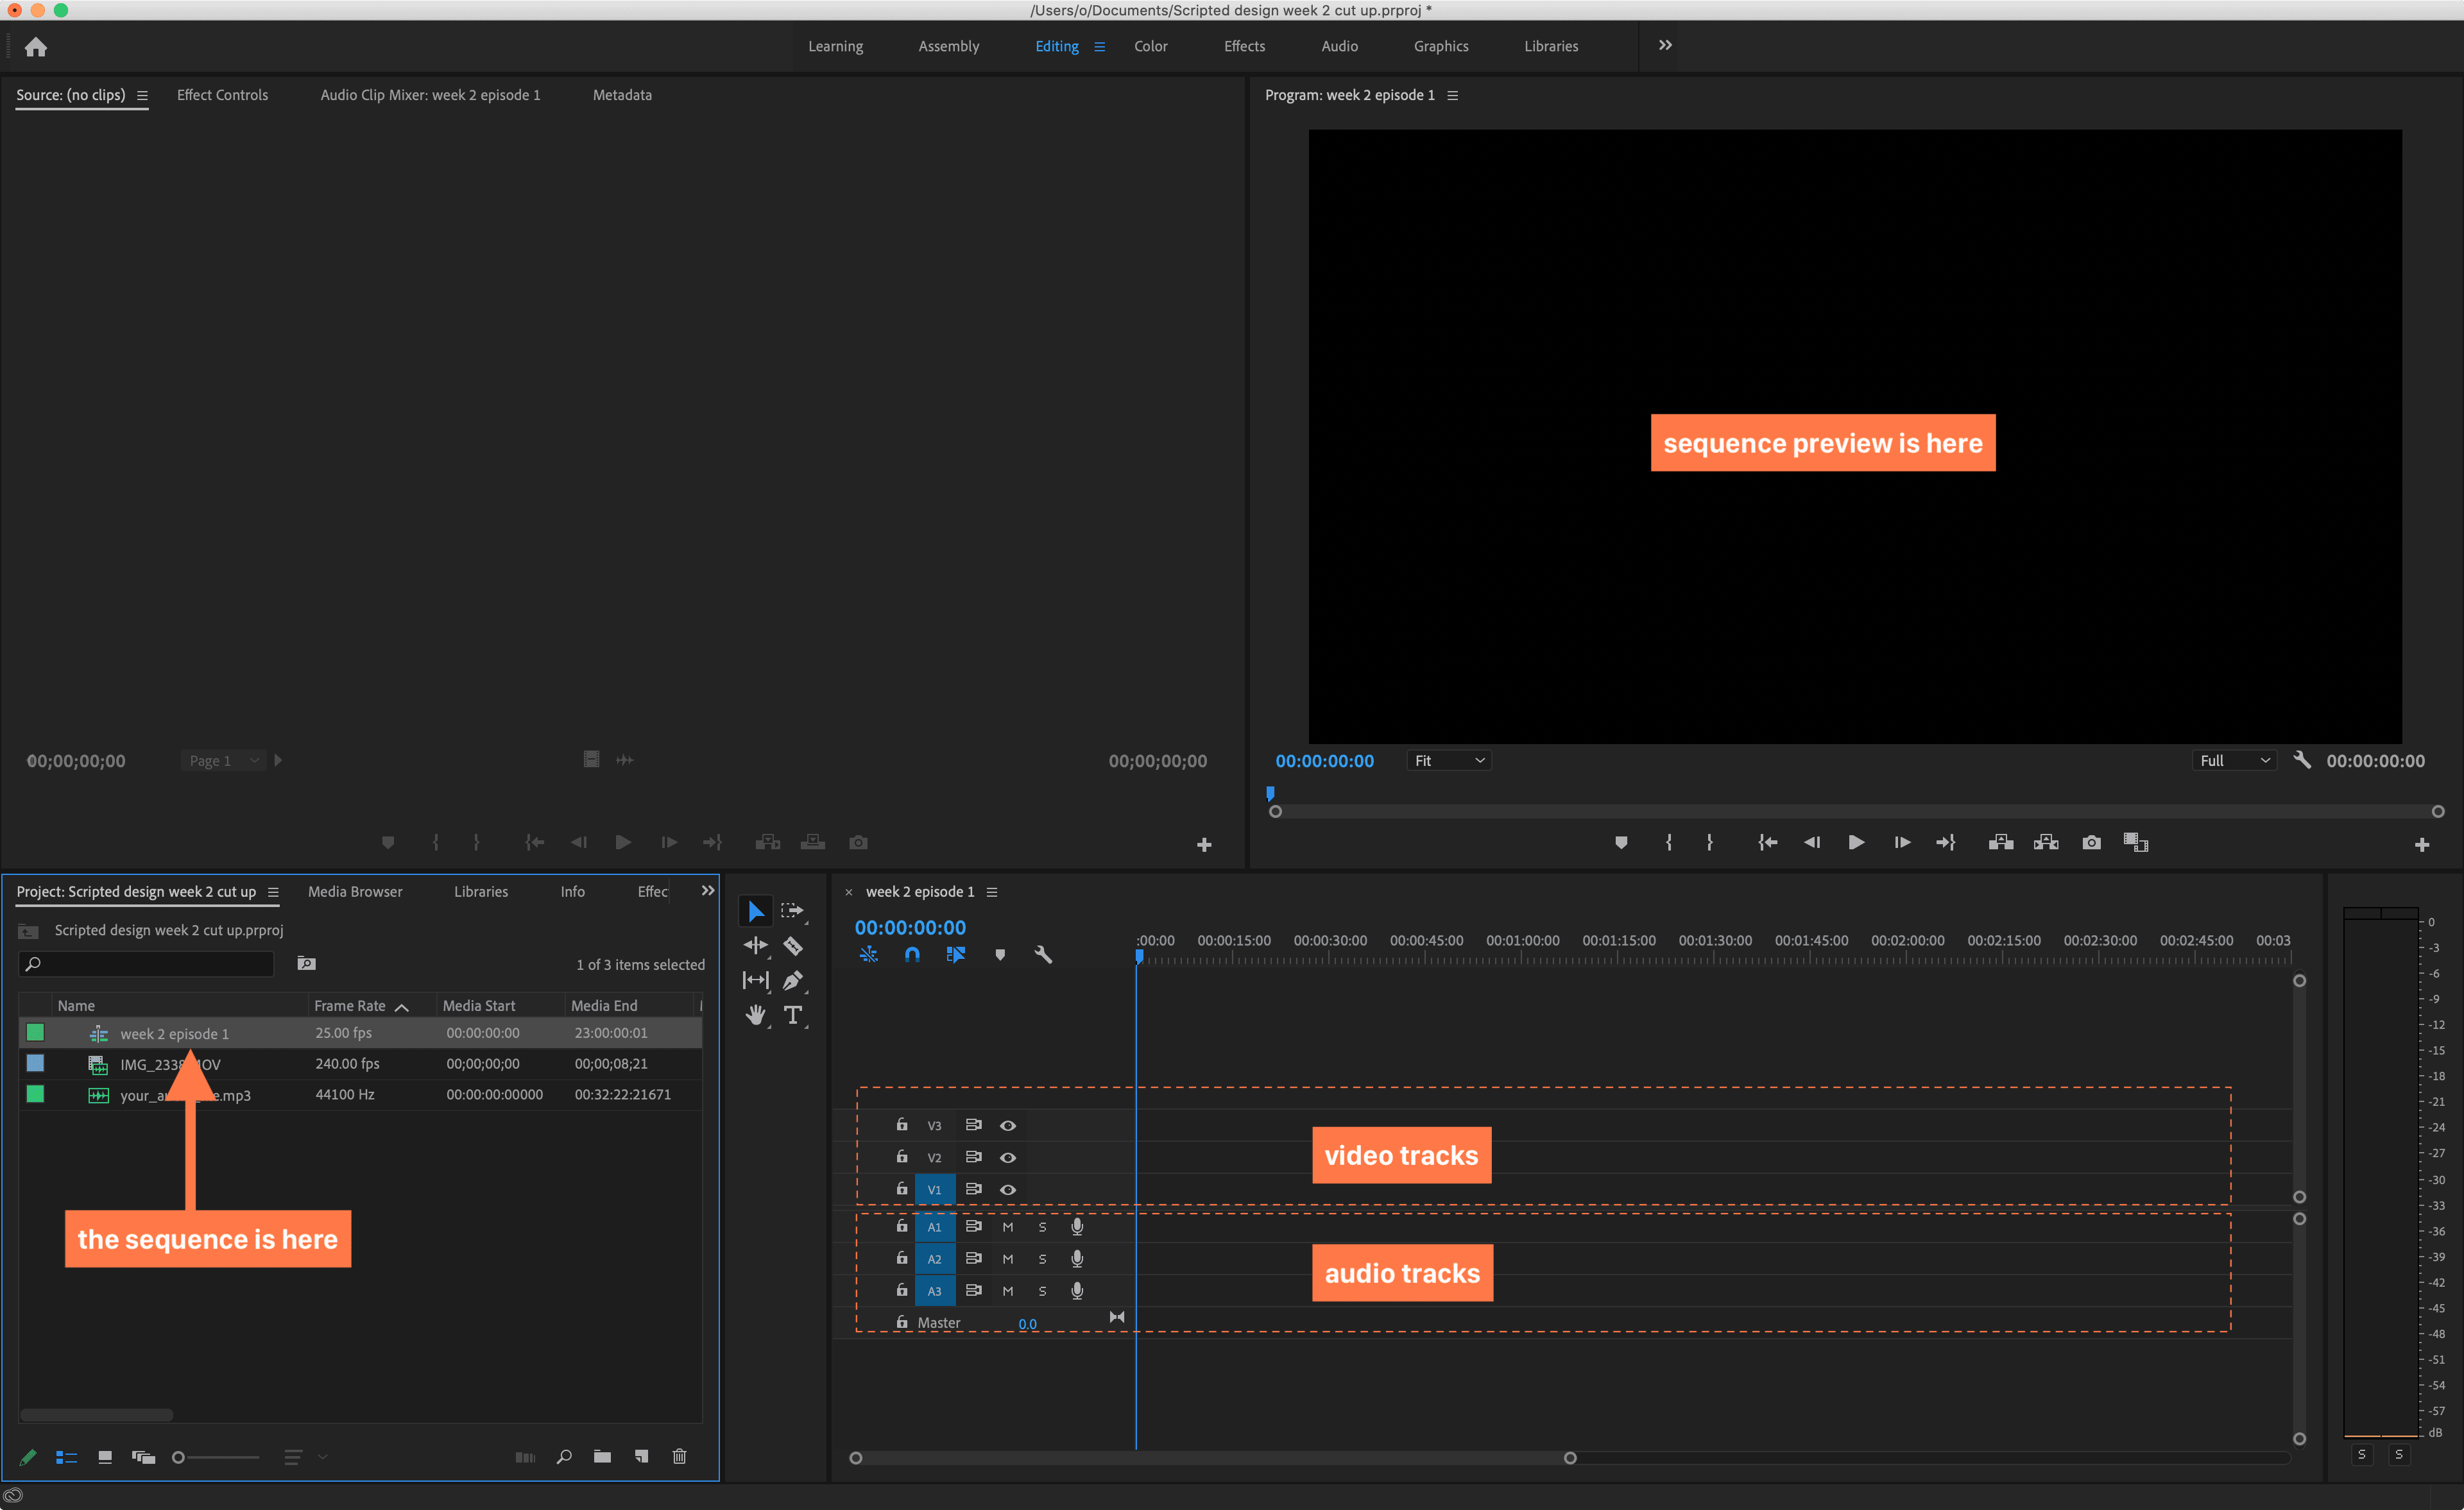 Your sequence, video, and audio file are in the media editor. At the top right pane is a preview of the currently selected sequence (which is blank right now). At the bottom right is the sequence timeline, which is also blank.
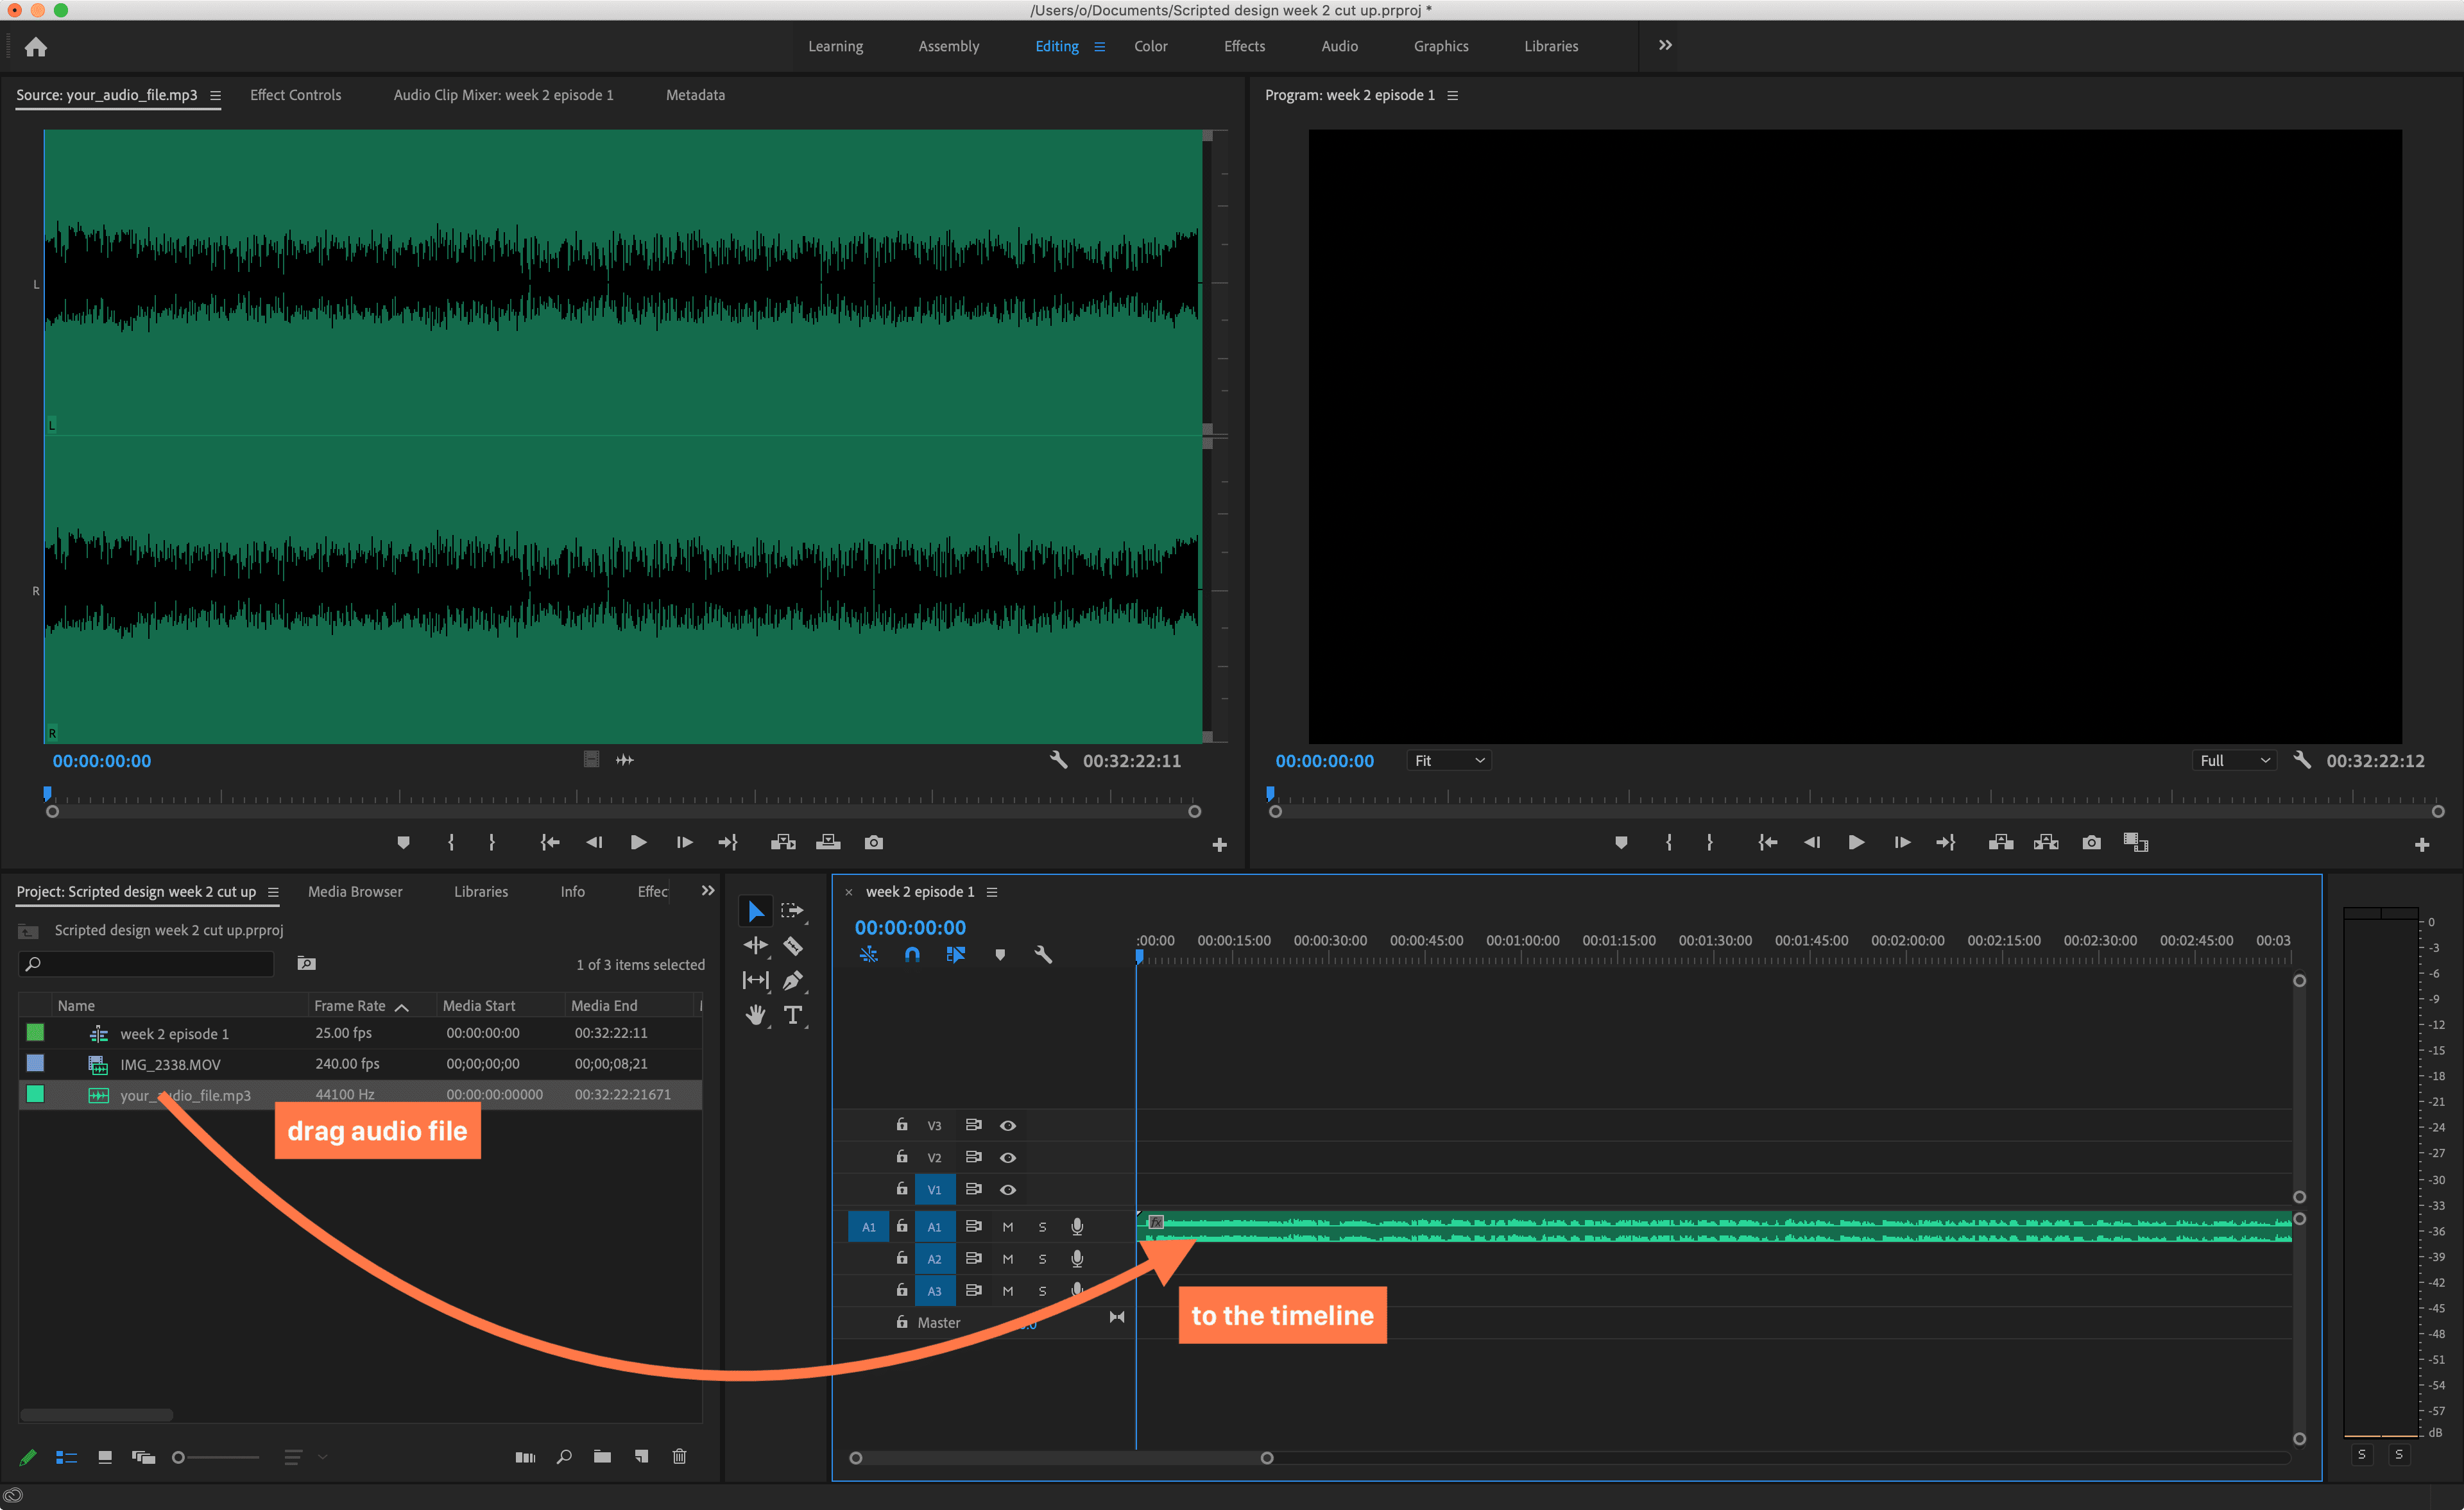
 - Drag your audio track into the sequence:
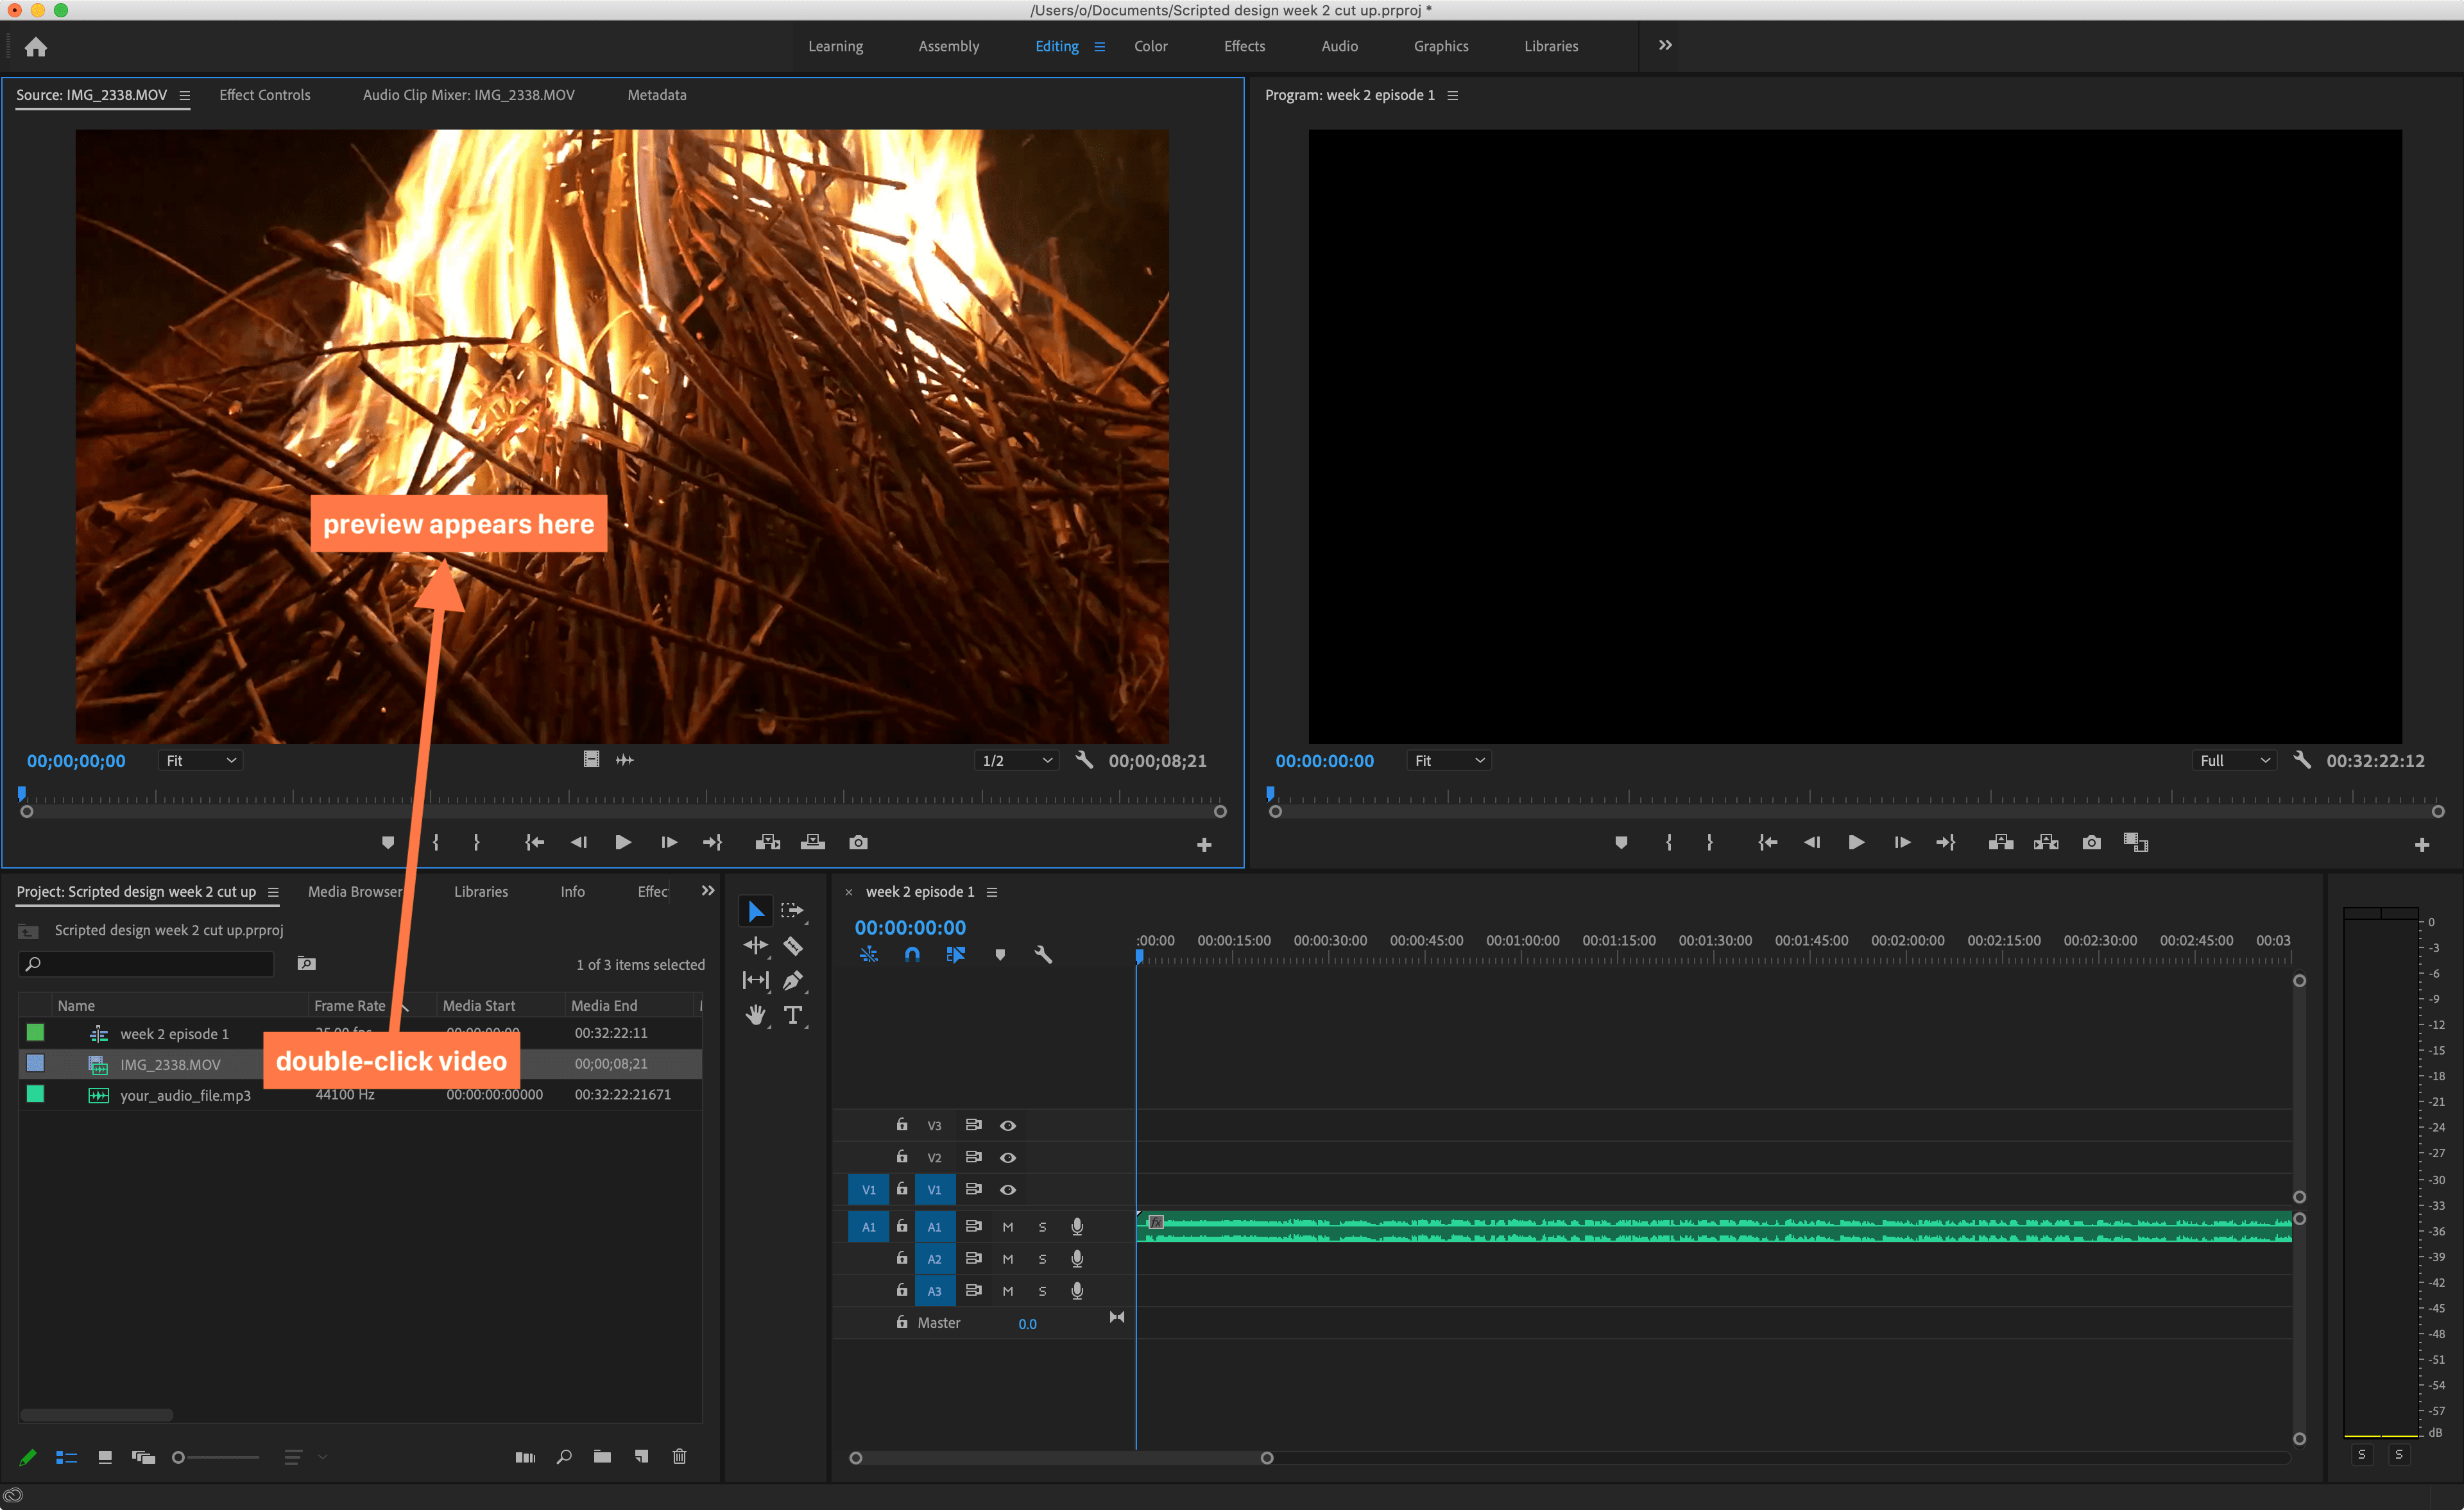
- Double-click on the video file. It should display a preview in the Source Monitor (top-left):
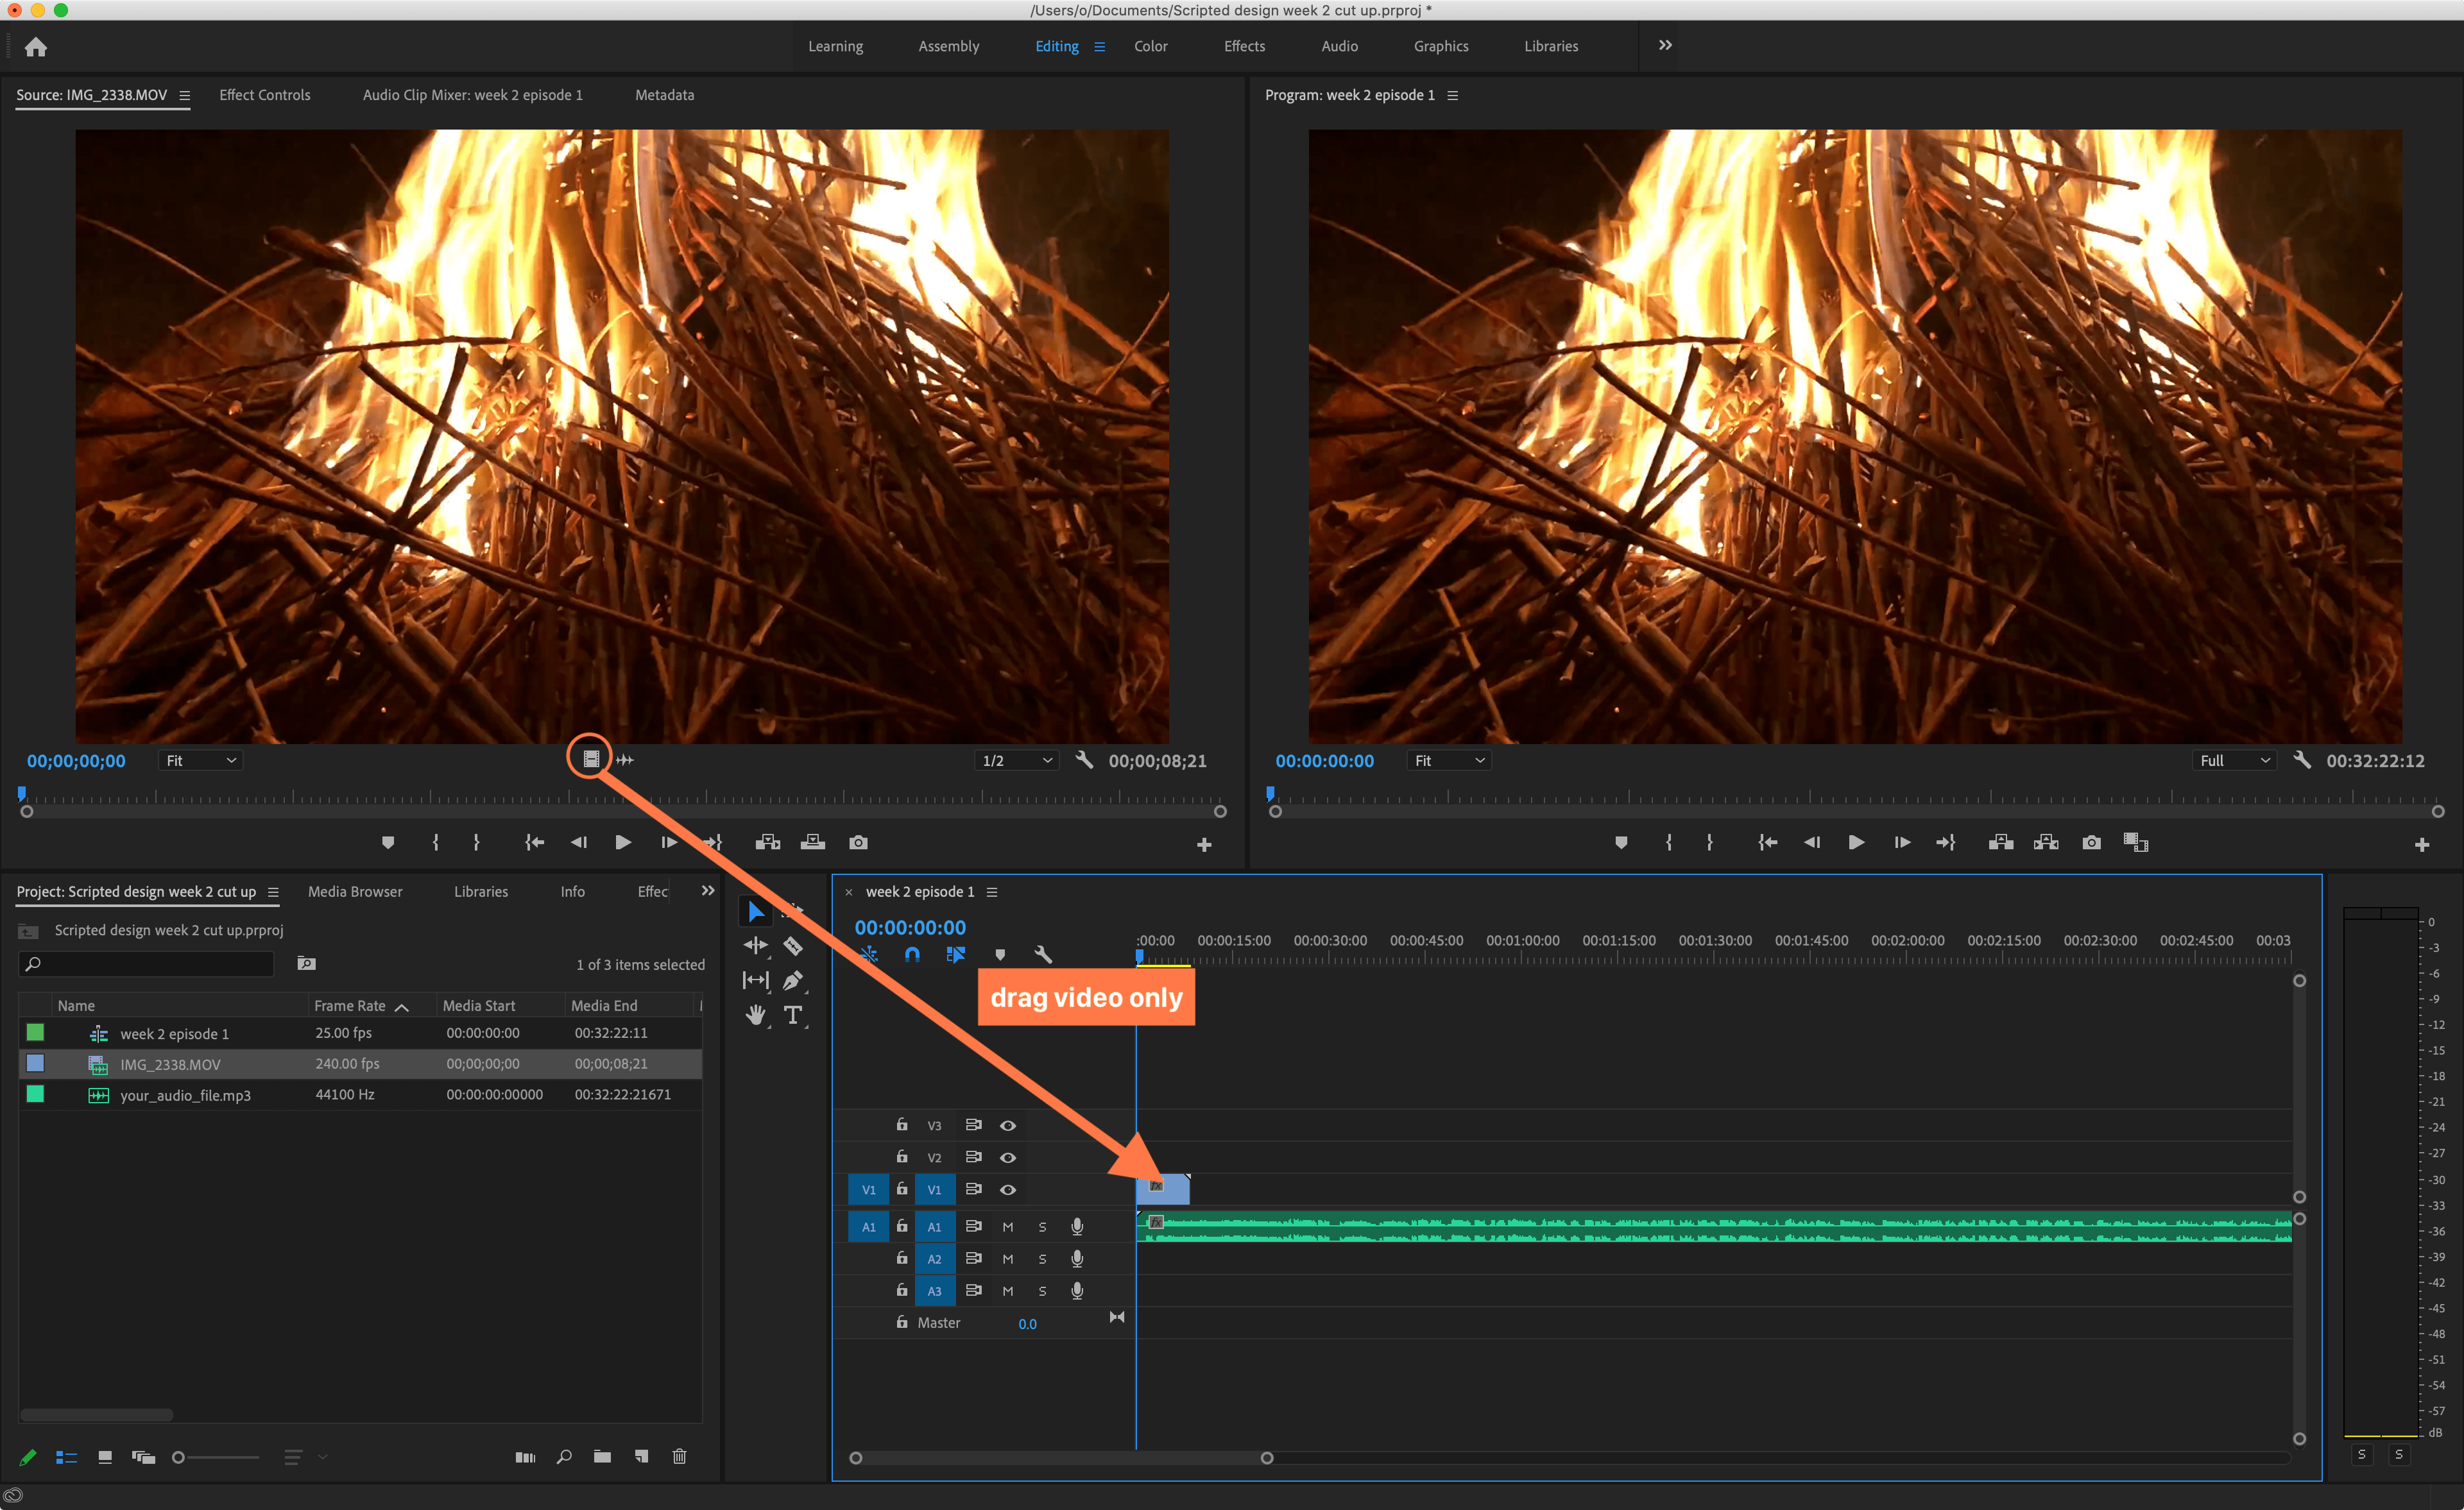
- Let’s familiarise ourselves with the ways we can import the video to the sequence:
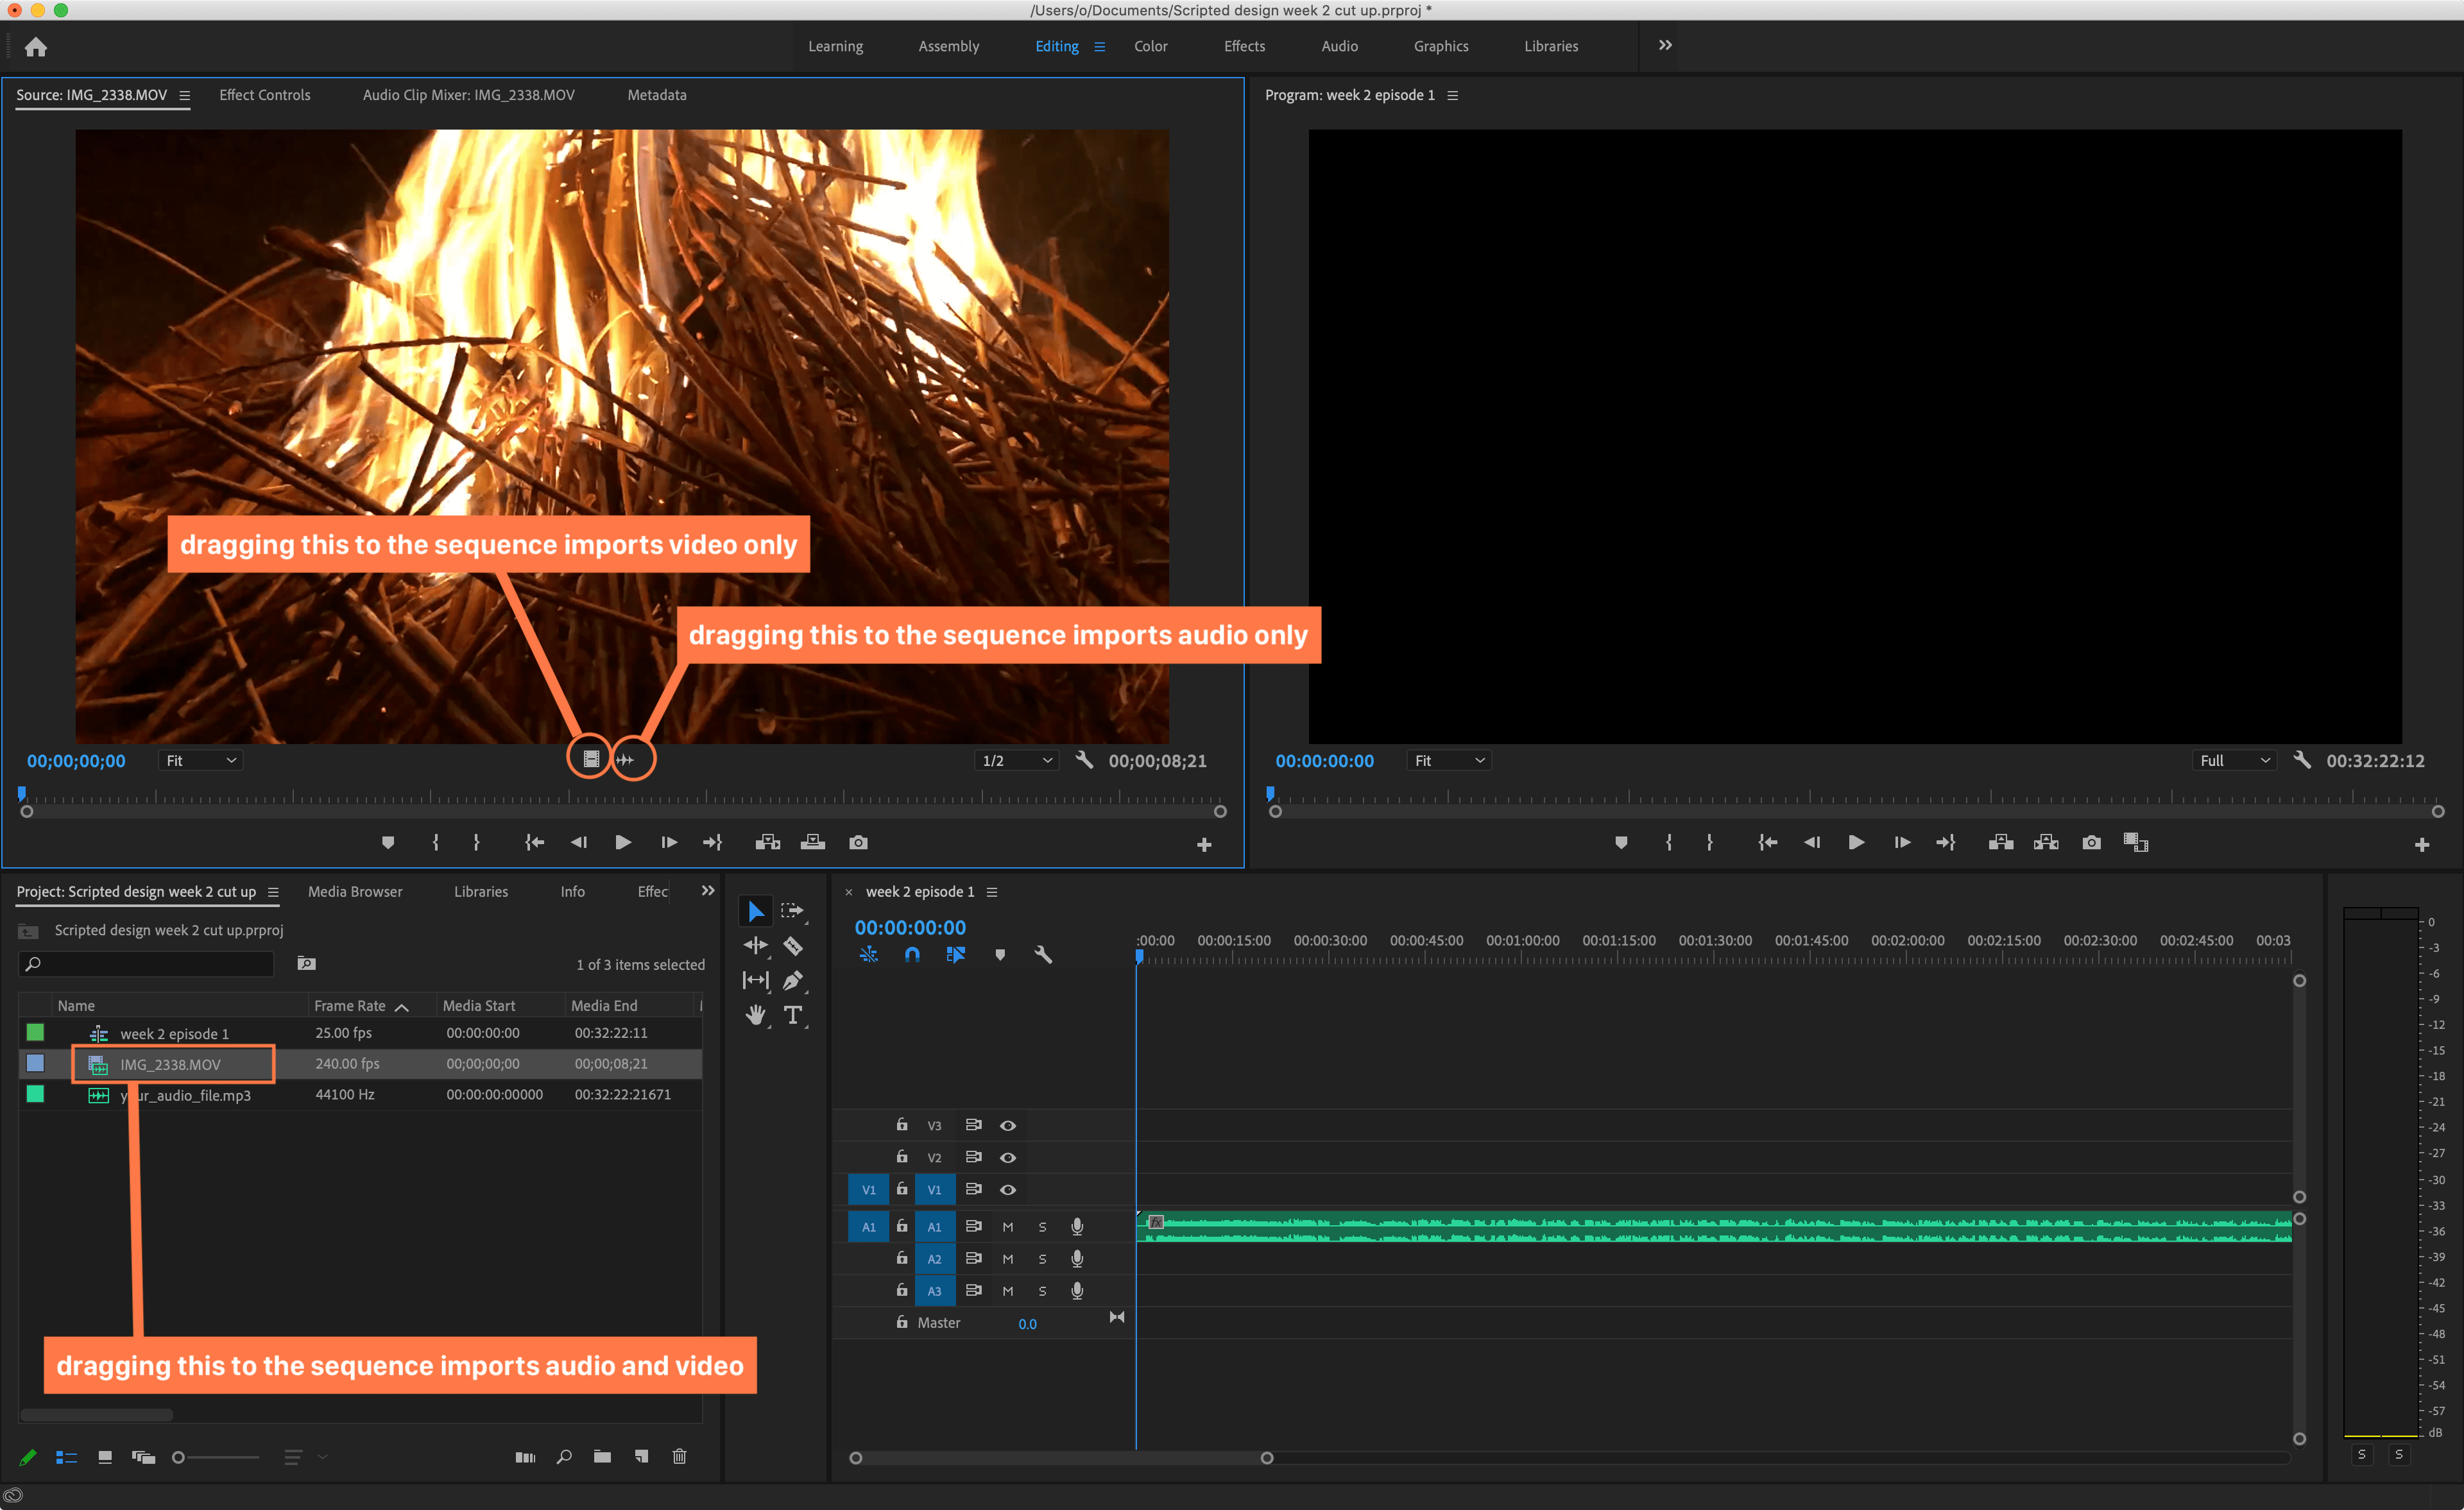
- Drag the video only into the sequence:
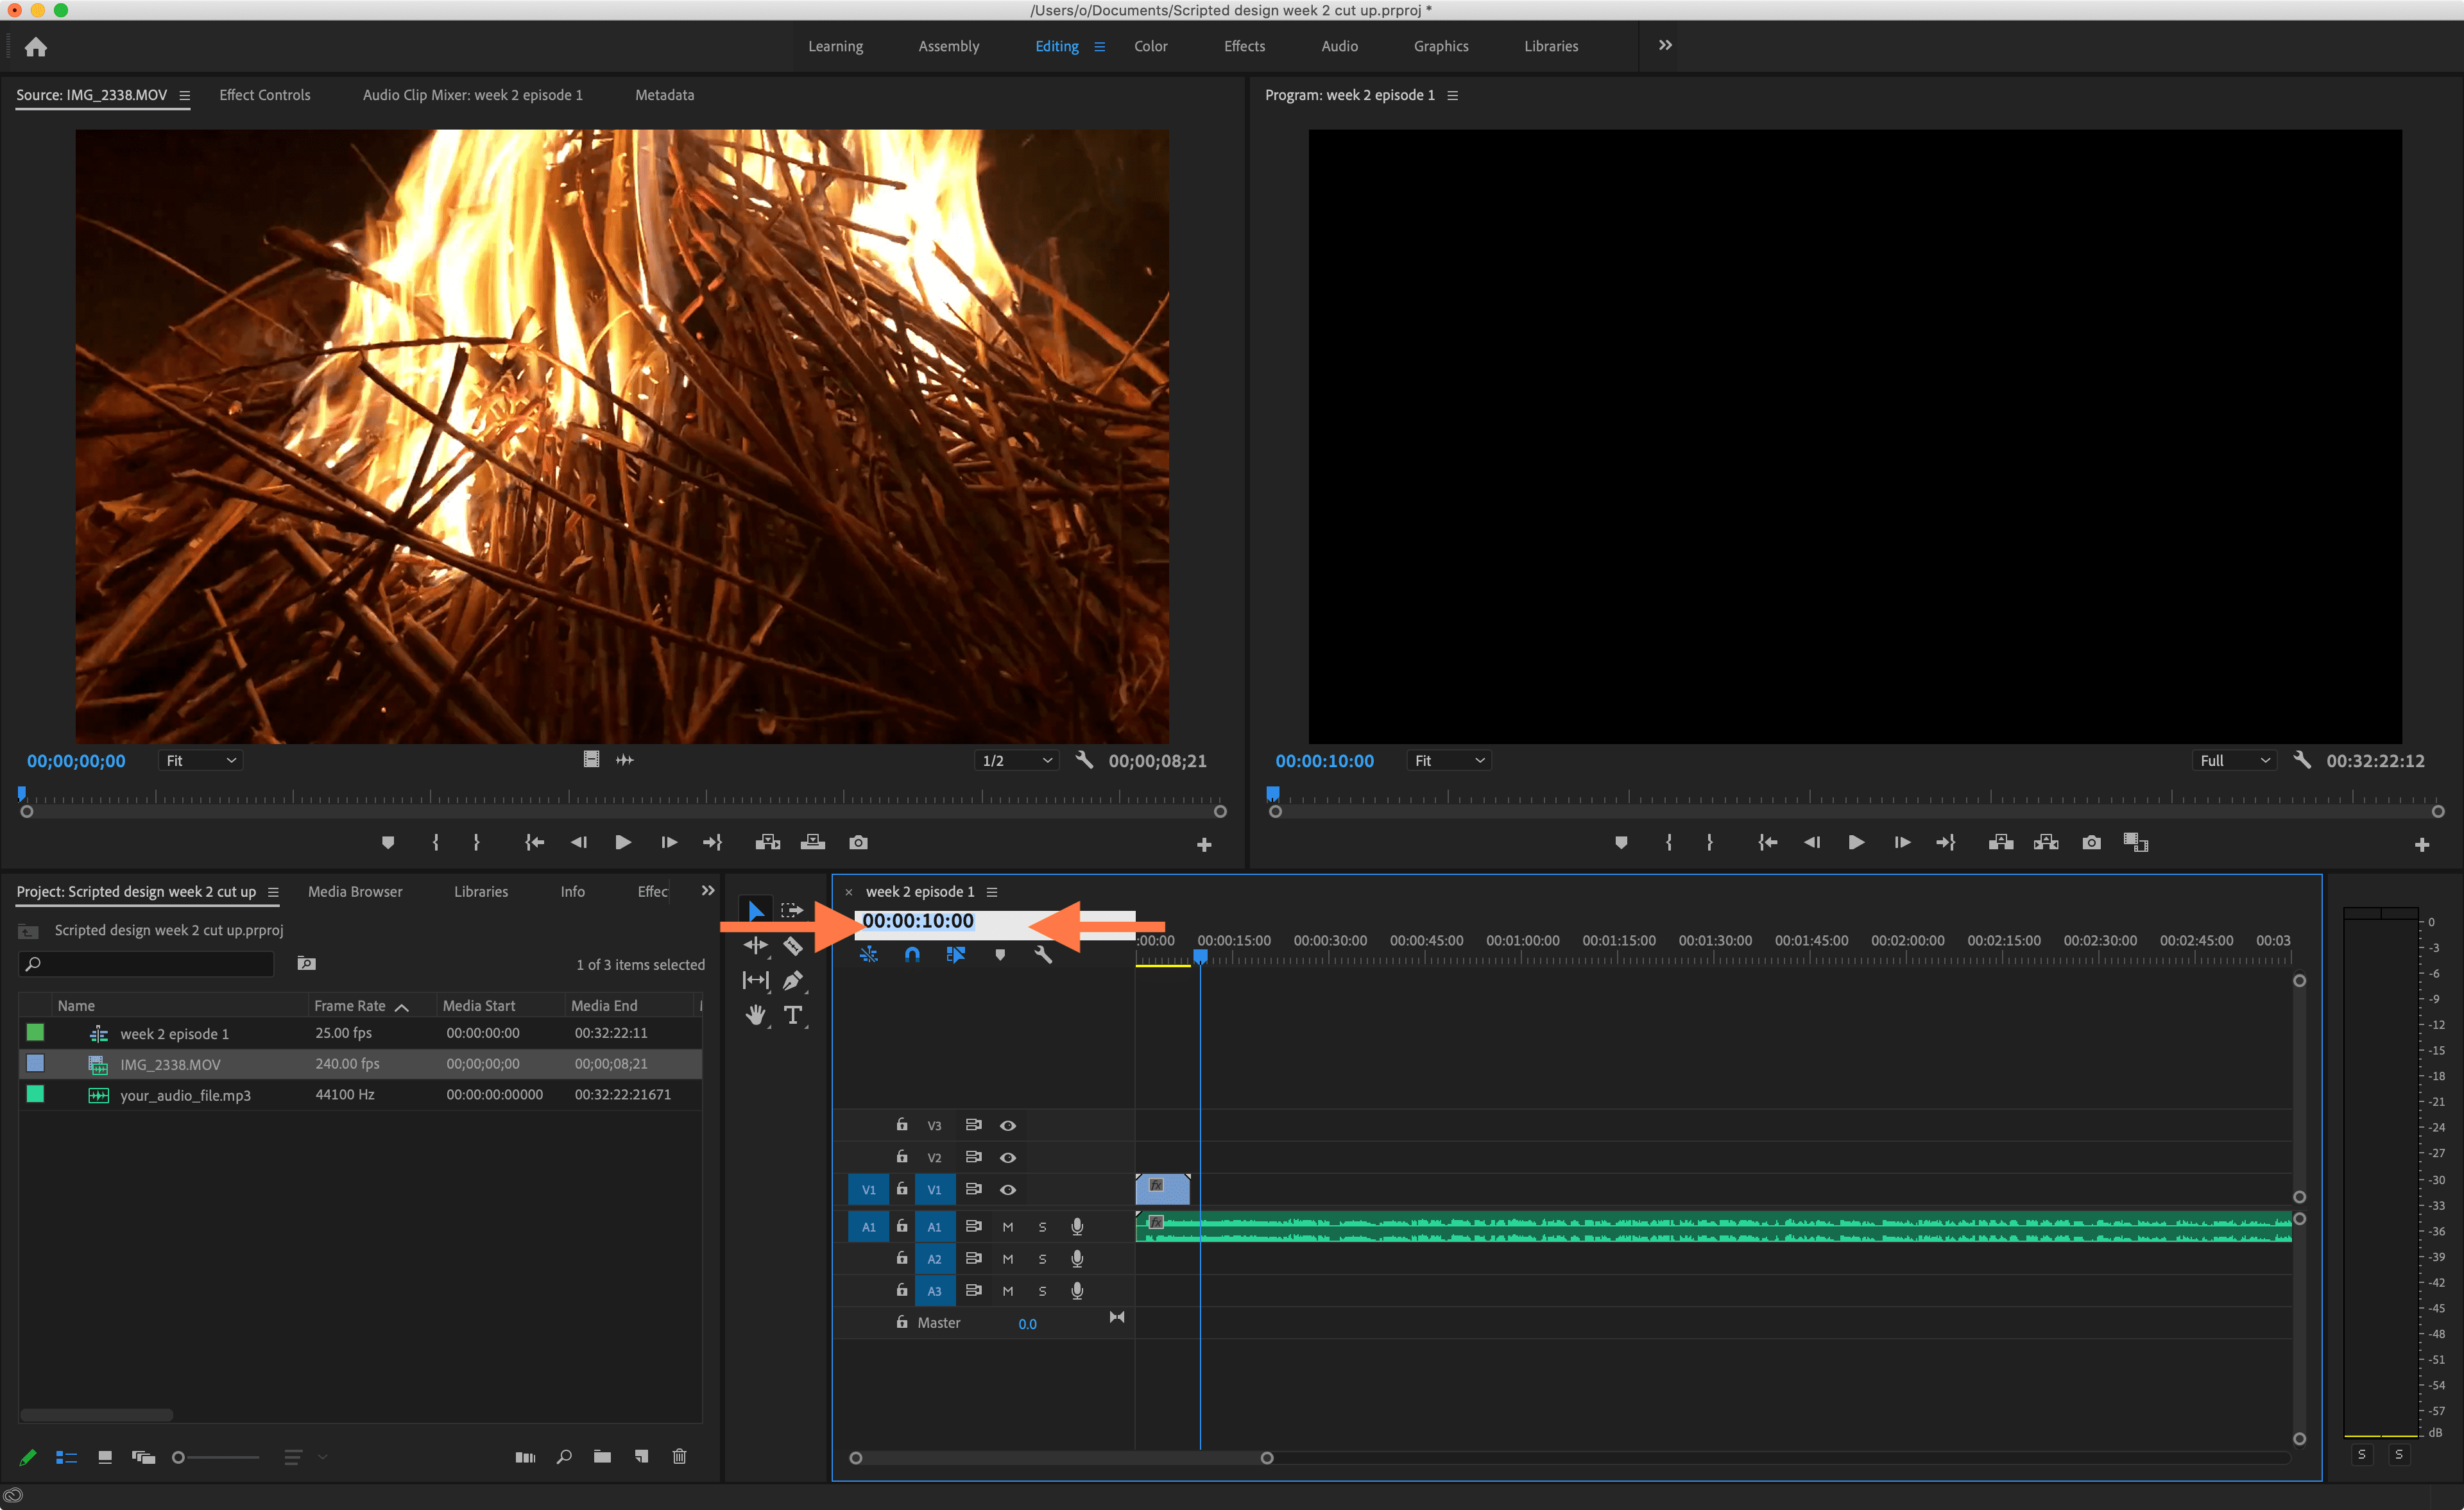
- Now let’s set the ‘out point’ for the video! This means that when we export the video, it will only export to a certain time. Click into the ‘playhead position’ box and type 00:00:10:00 (to jump to ten seconds). If you ever want to cut to a precise time (which you will have to for later exercises), be sure to use the ‘playhead position’ box for accuracy.
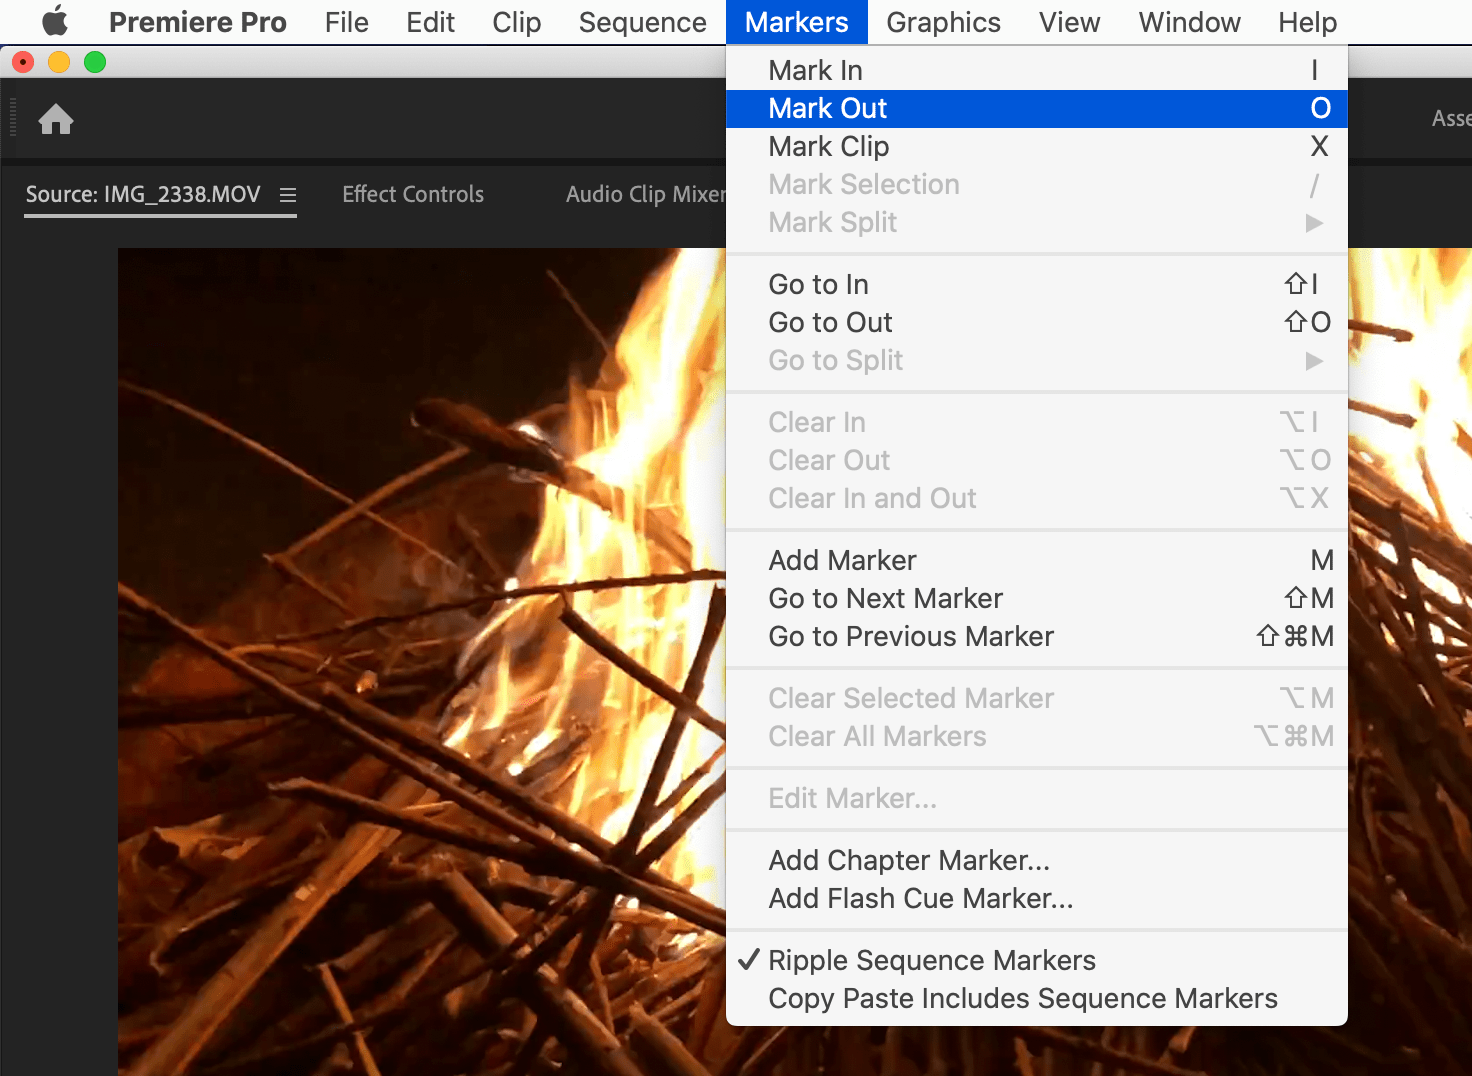
- Now click ‘Markers > Mark Out’ (or press ‘O’). Now when you export the video, it will only export until this point. Note: there is a ‘Mark in’ function too, but here we’re starting at time 00:00:00:00.
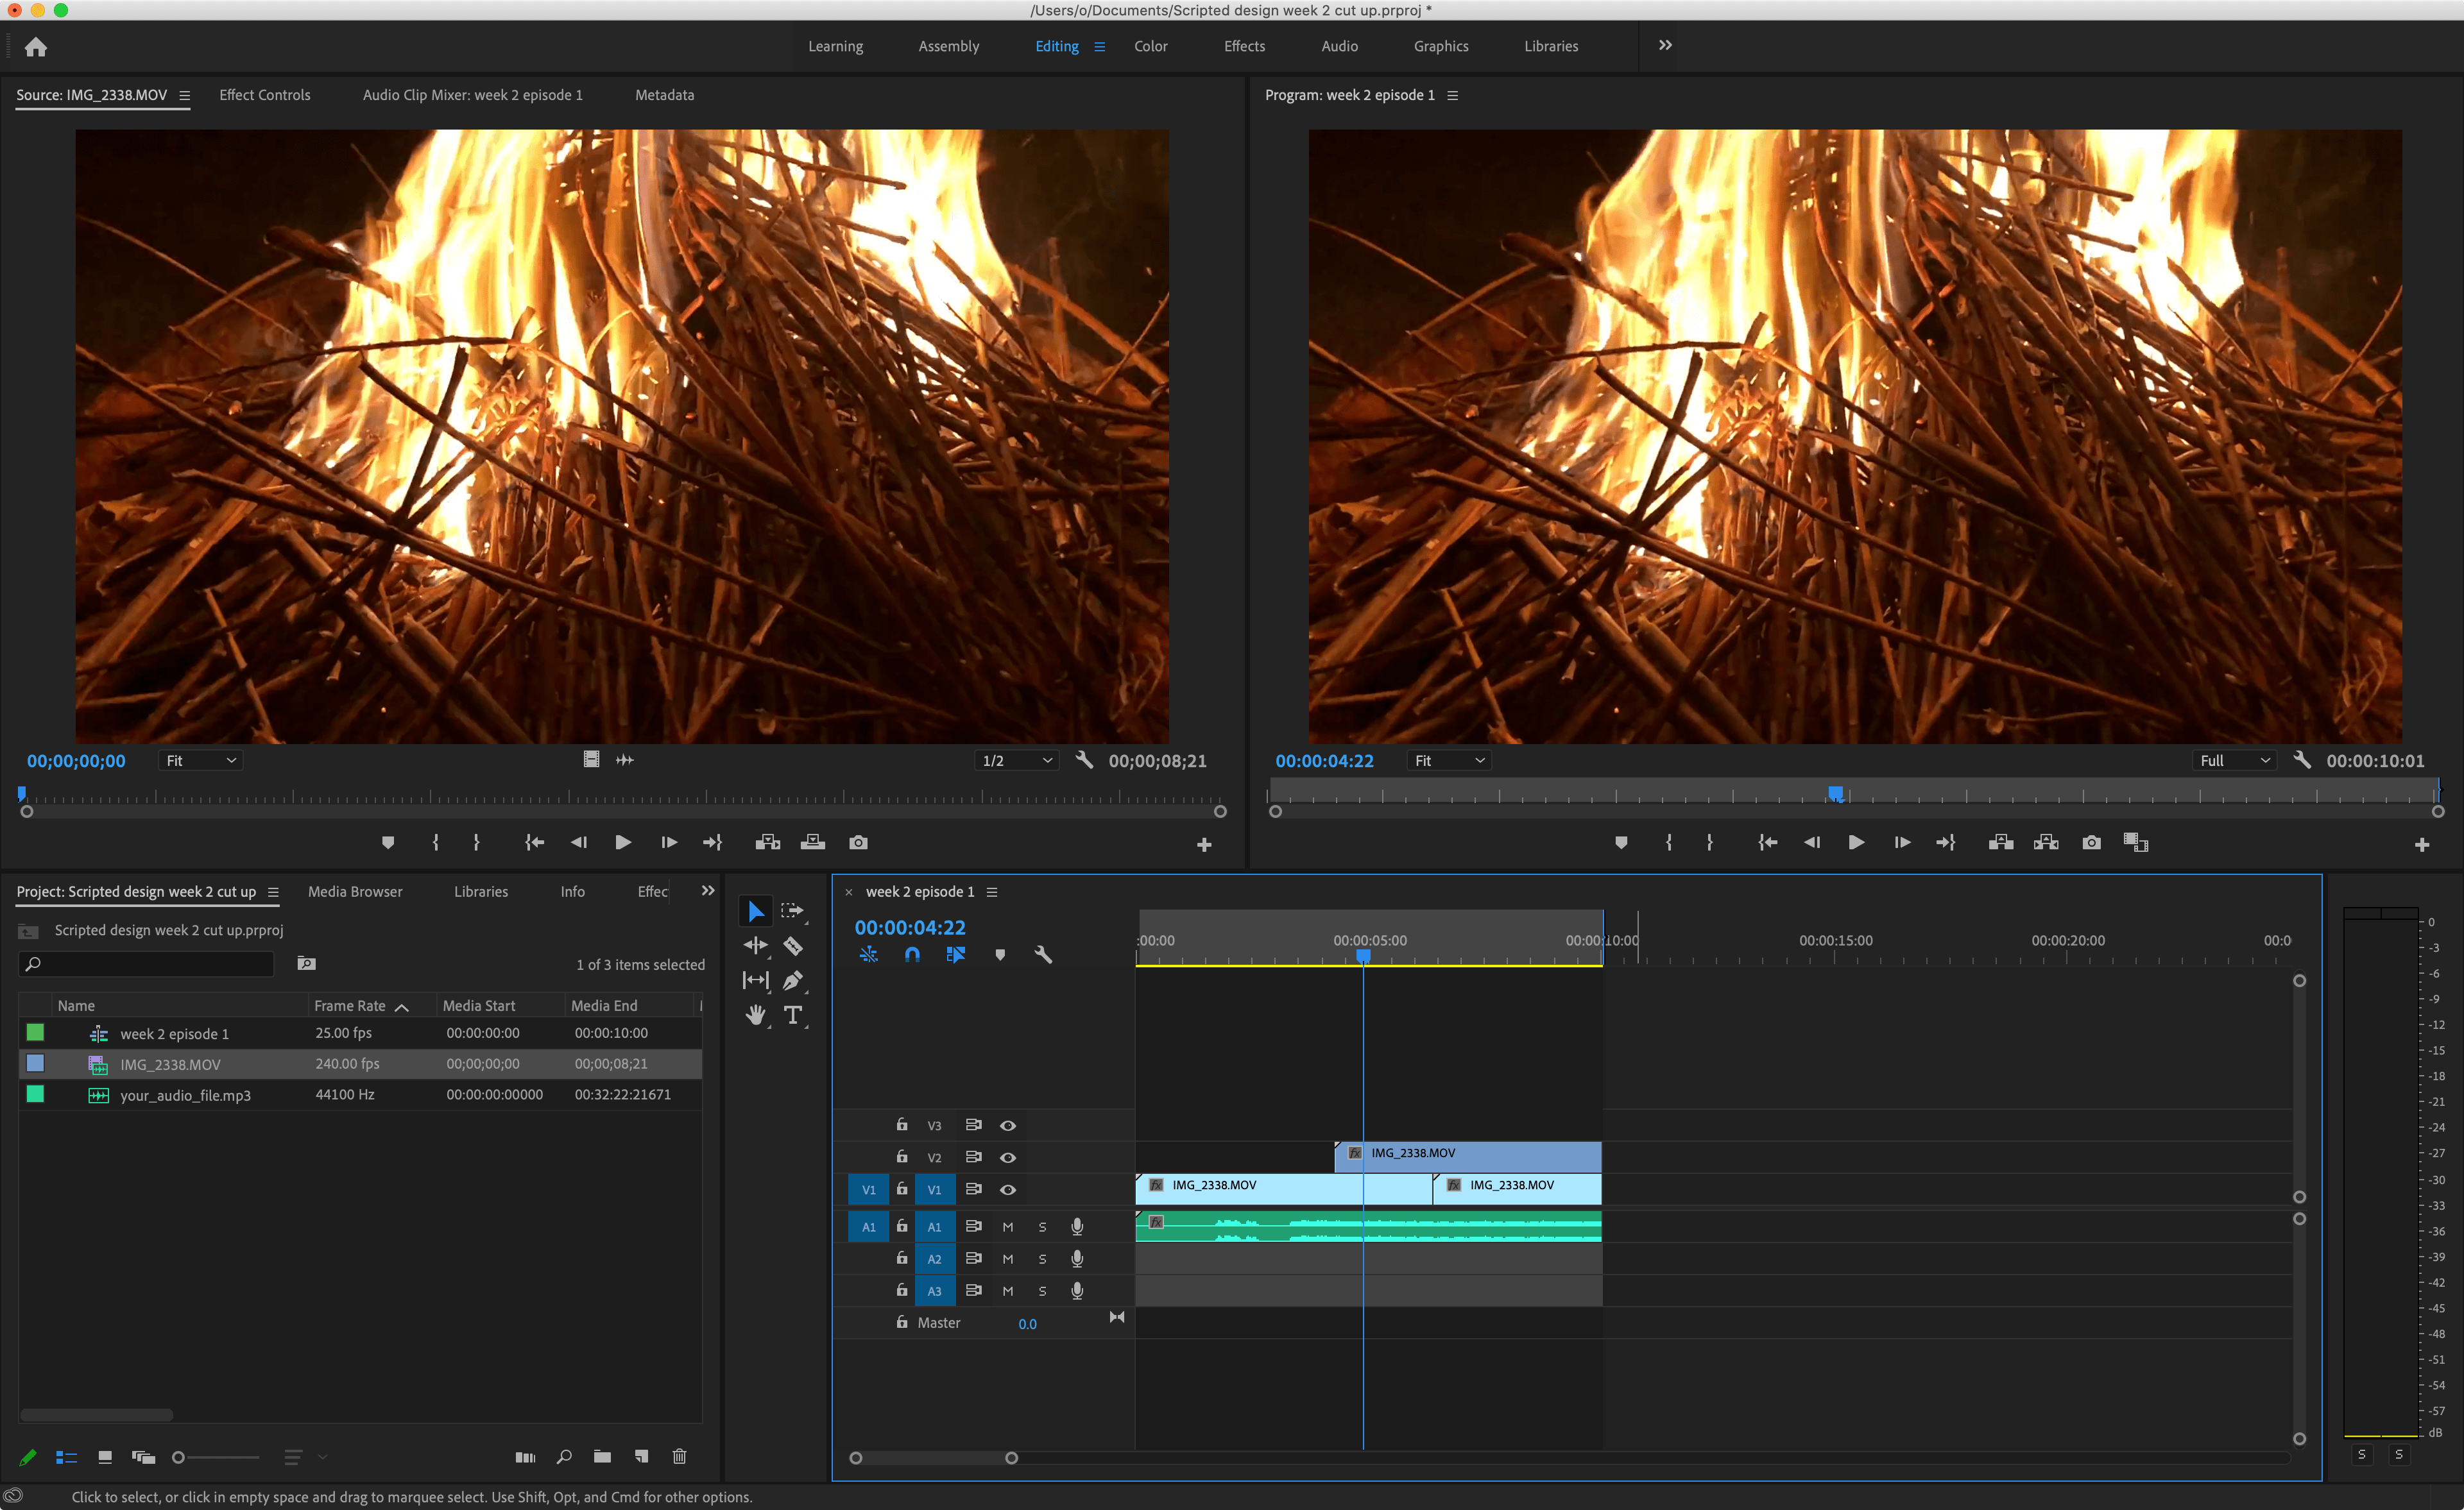
- Do whatever editing you want for your clips. Here you can see I’ve copied and pasted my clip a few times, and cut the ends of the audio and video to match the ‘out’ point (this is very easy to do if you have ‘Sequence > Snap in Timeline’ switched on.
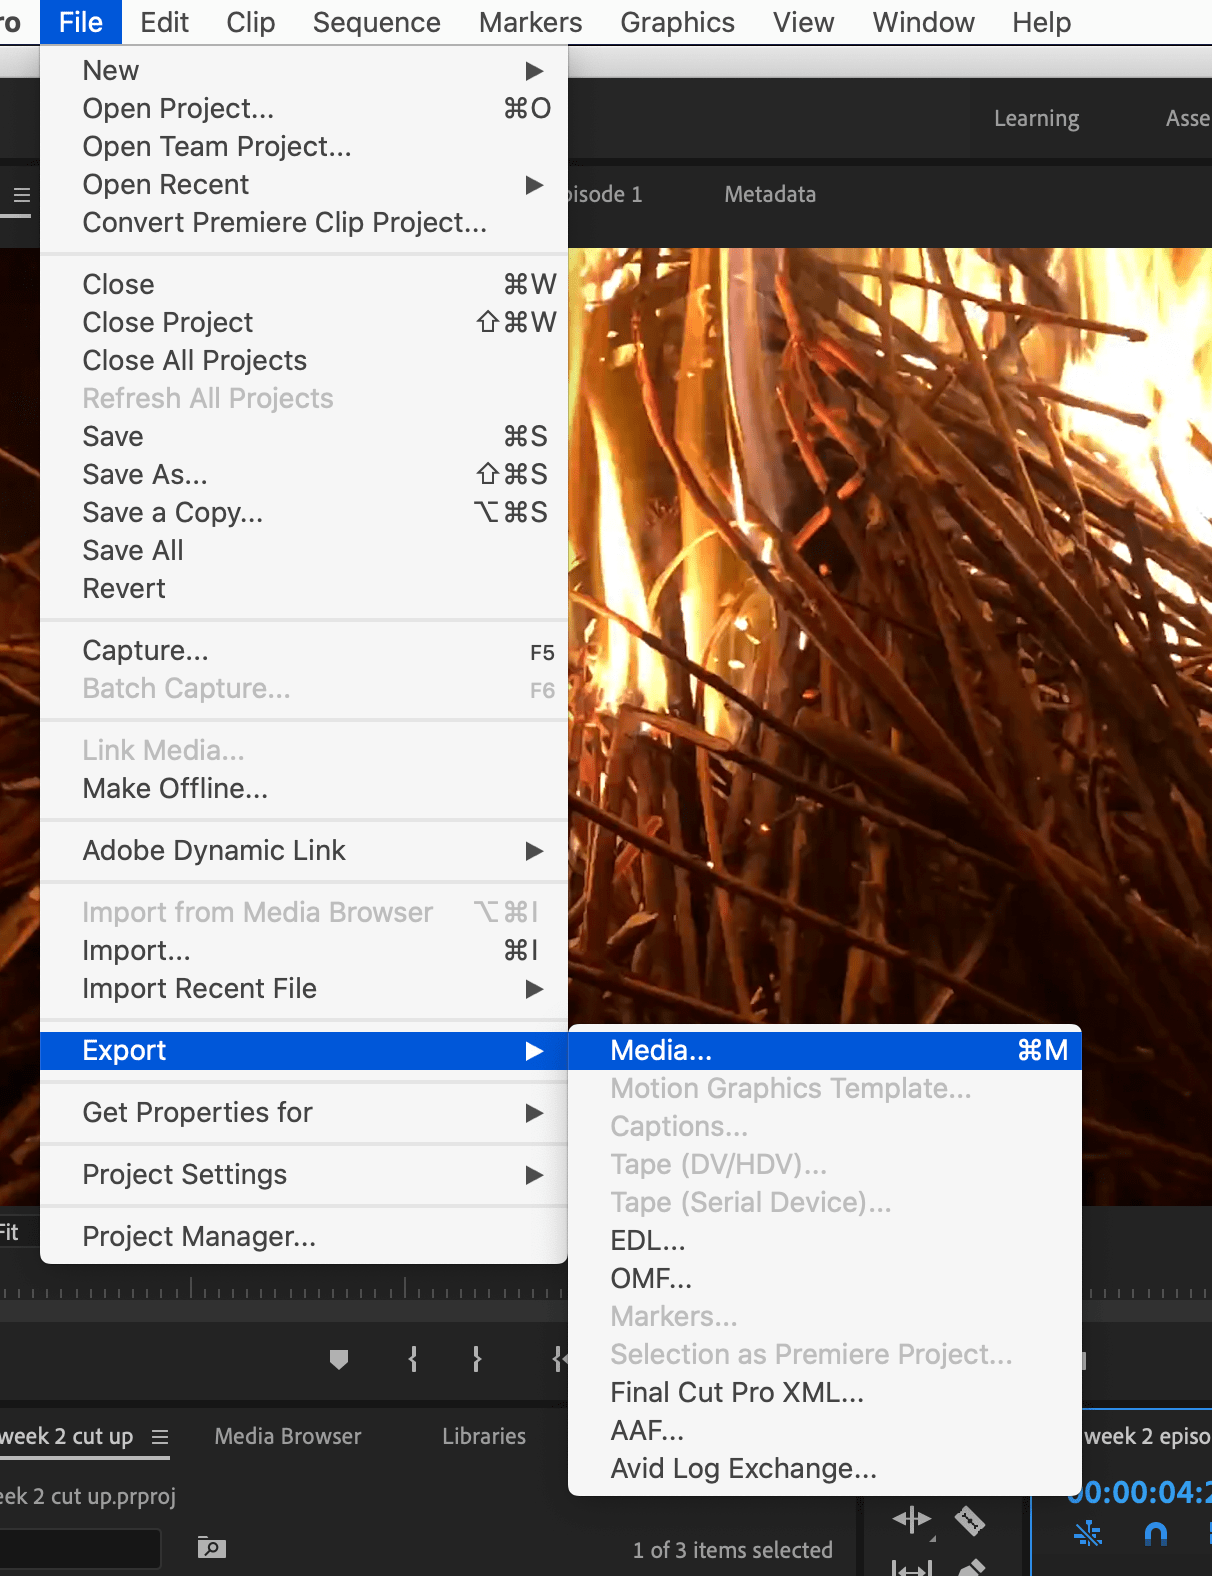
- Once you’re happy with your sequence, press ‘File > Export > Media’
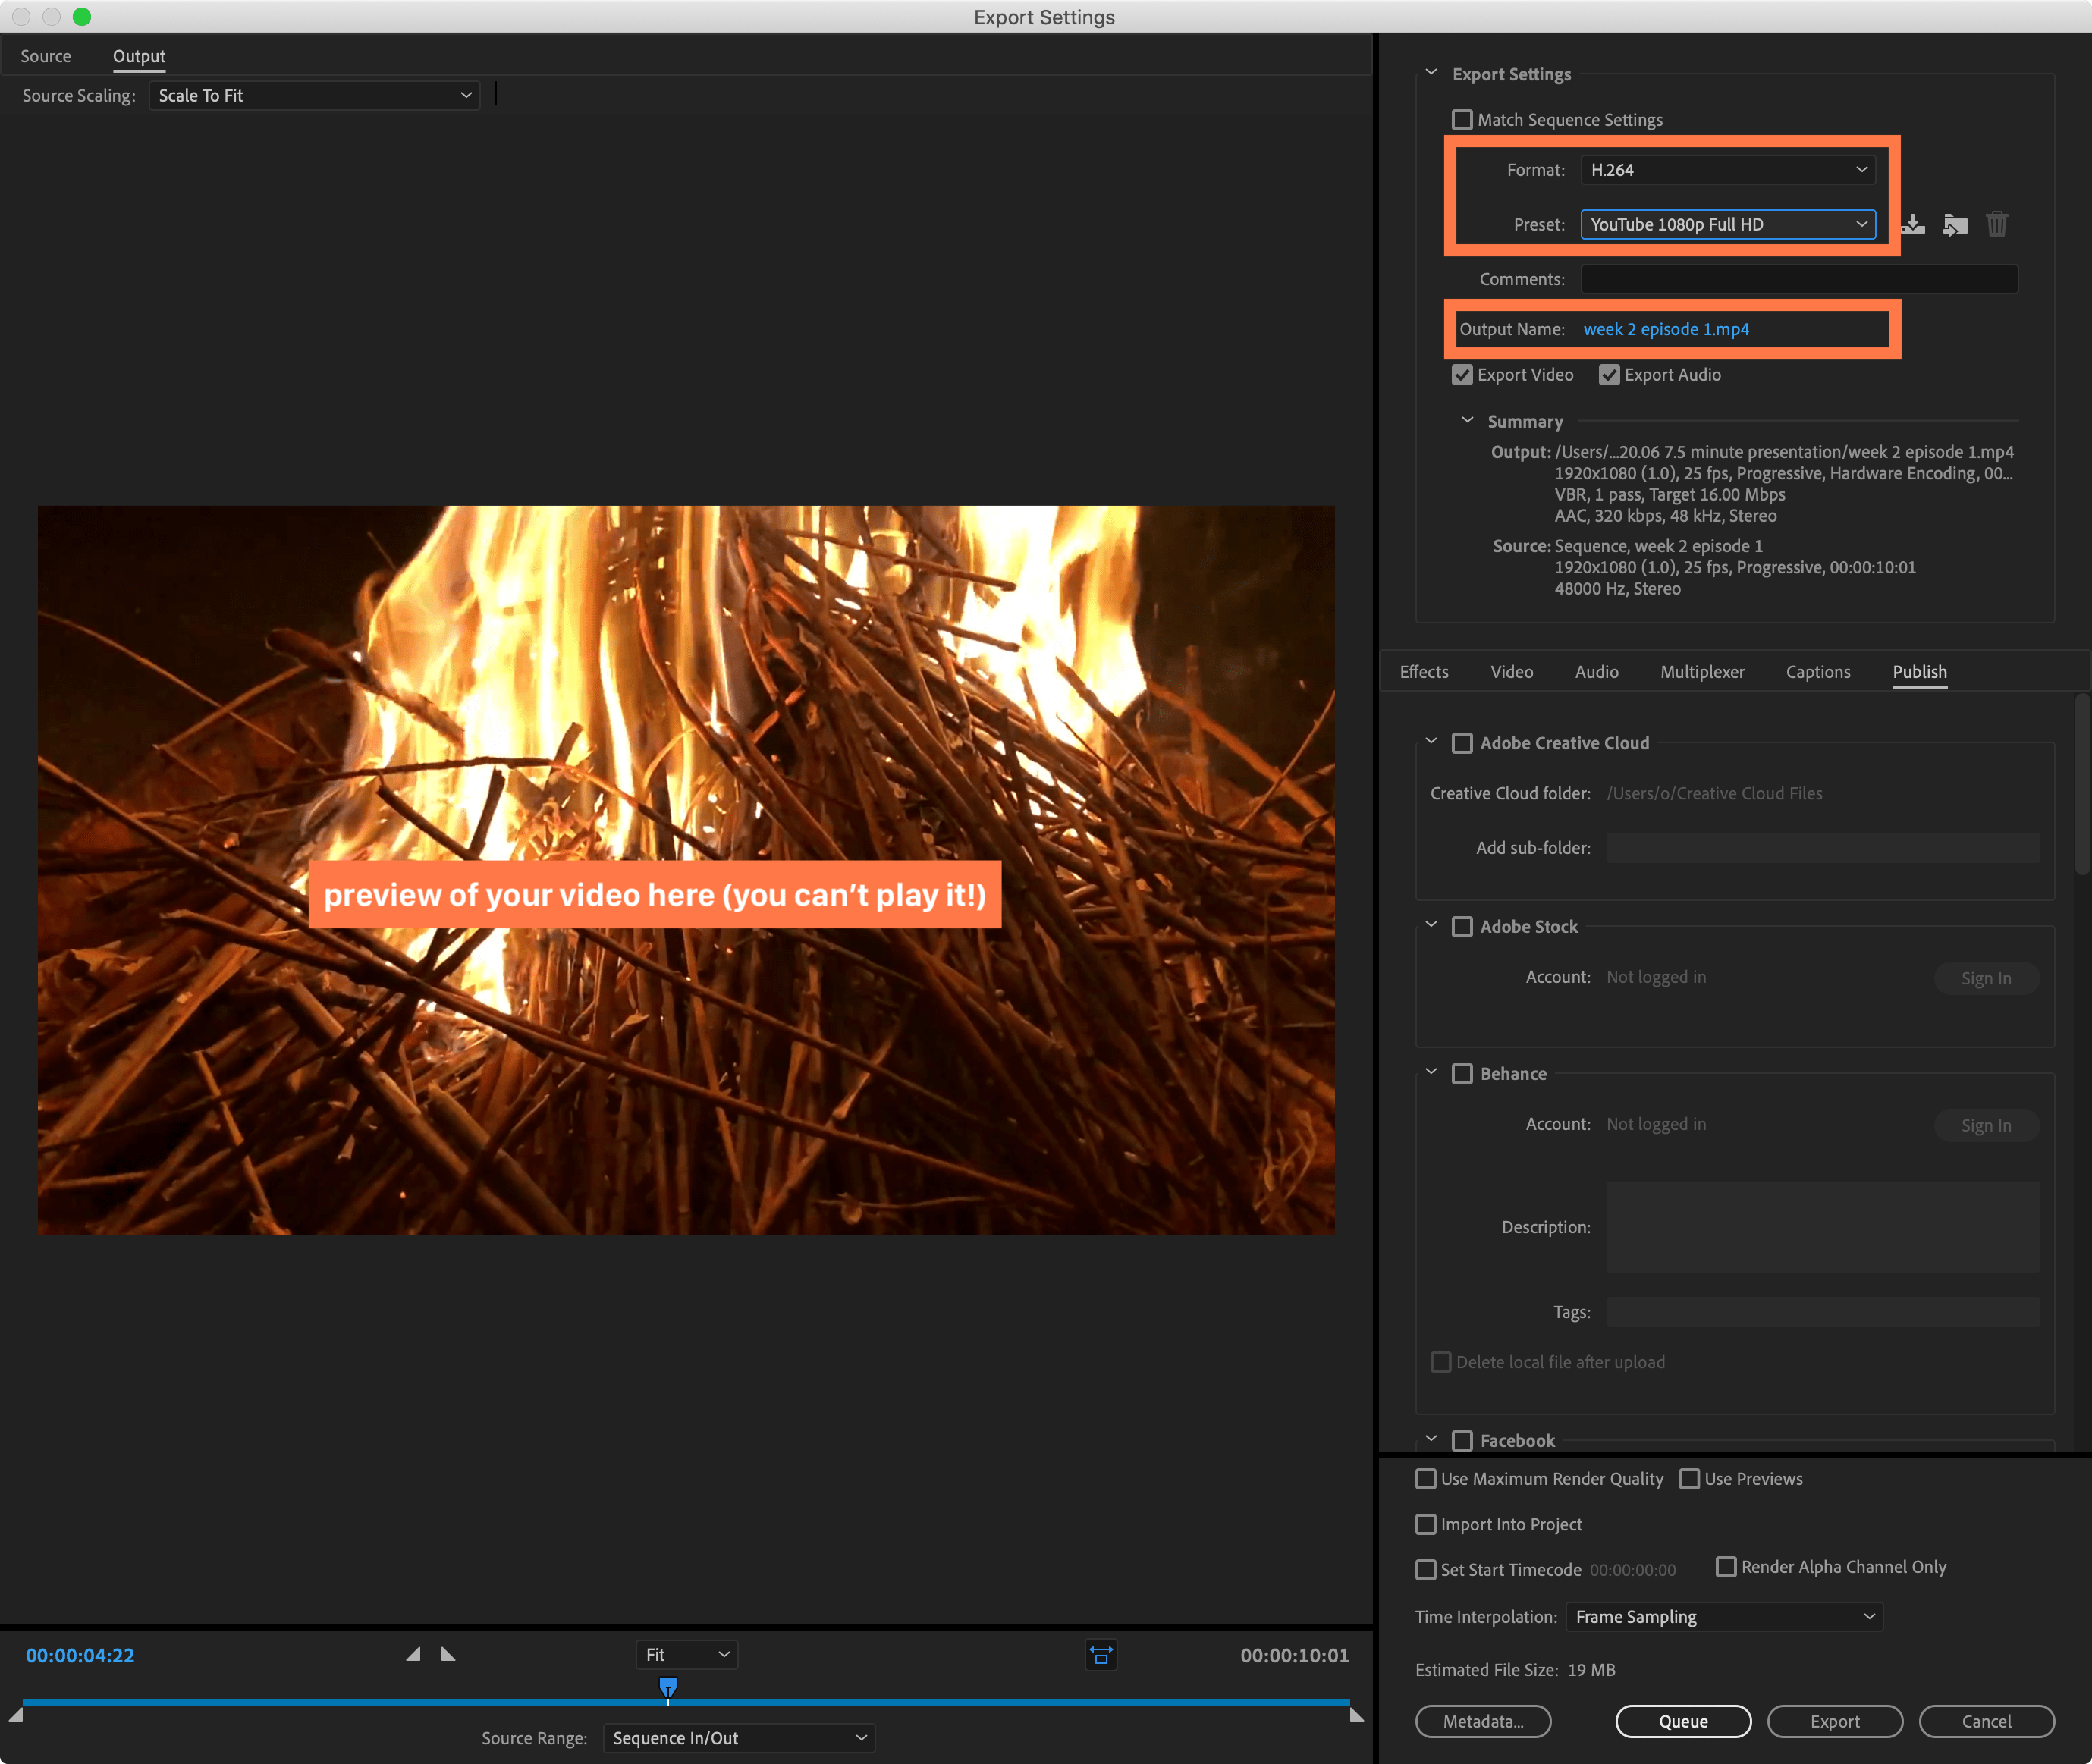
- A window like this one will pop up. This is where you choose what format of video you’d like to export. To keep it easy, I’ve selected ‘Format: H.264’ and ‘Preset: YouTube 1080p HD’. These are quite solid, generic settings. Click on the file name in ‘Output name’ to choose where you want to save.
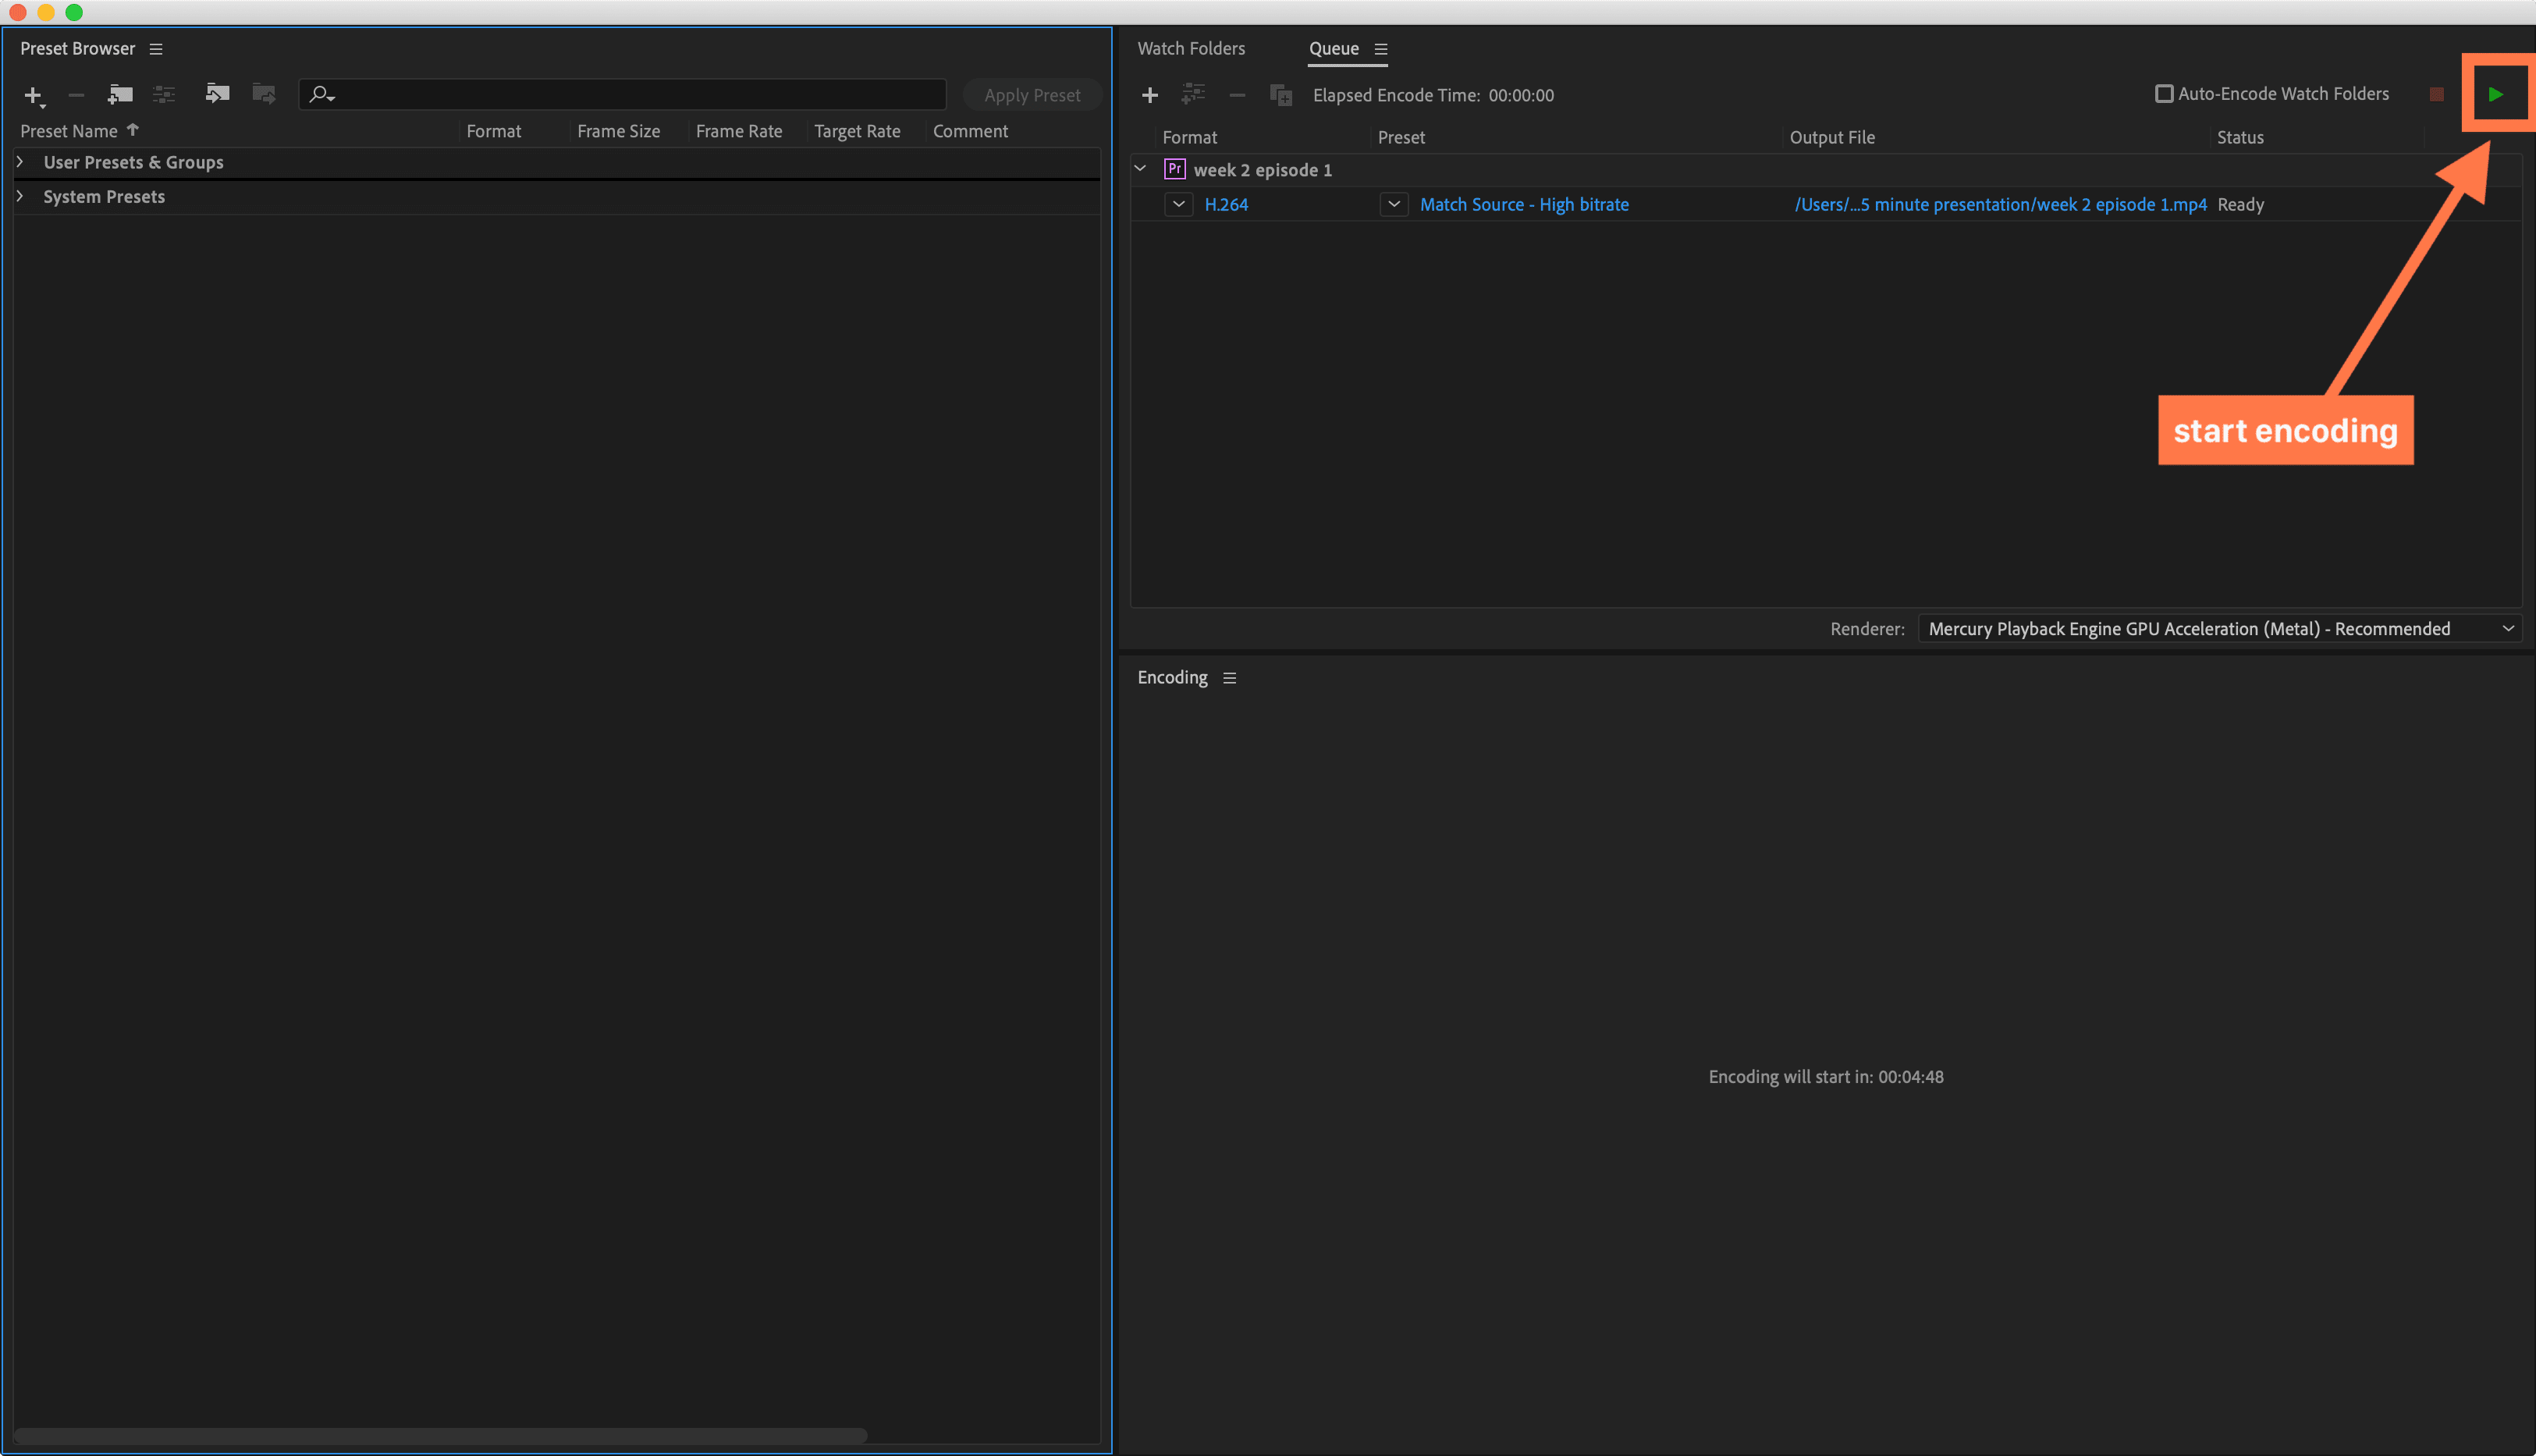
- Now you have a choice. If you want to just export the file, you can just hit ‘Export’ to export from inside Premiere Pro. However, if you just hit ‘Export’, you can’t use Premiere Pro again until the export has finished. I recommend you use the Adobe Media Encoder to export your videos (hit ‘Queue’ instead of ‘Export’). Media Encoder is a separate programme, but it means you can carry on using Premiere Pro to edit files whilst you’re exporting - so you can line up a few videos to export, and do them in a batch. It’s really handy if your computer is slow - you can line up a few files to export at once, and leave your computer exporting them all at once (e.g. whilst you’re sleeping!).
Press ‘Queue’, and Media Encoder will open (it may take some time!). Once you’re ready to export, press the play button:
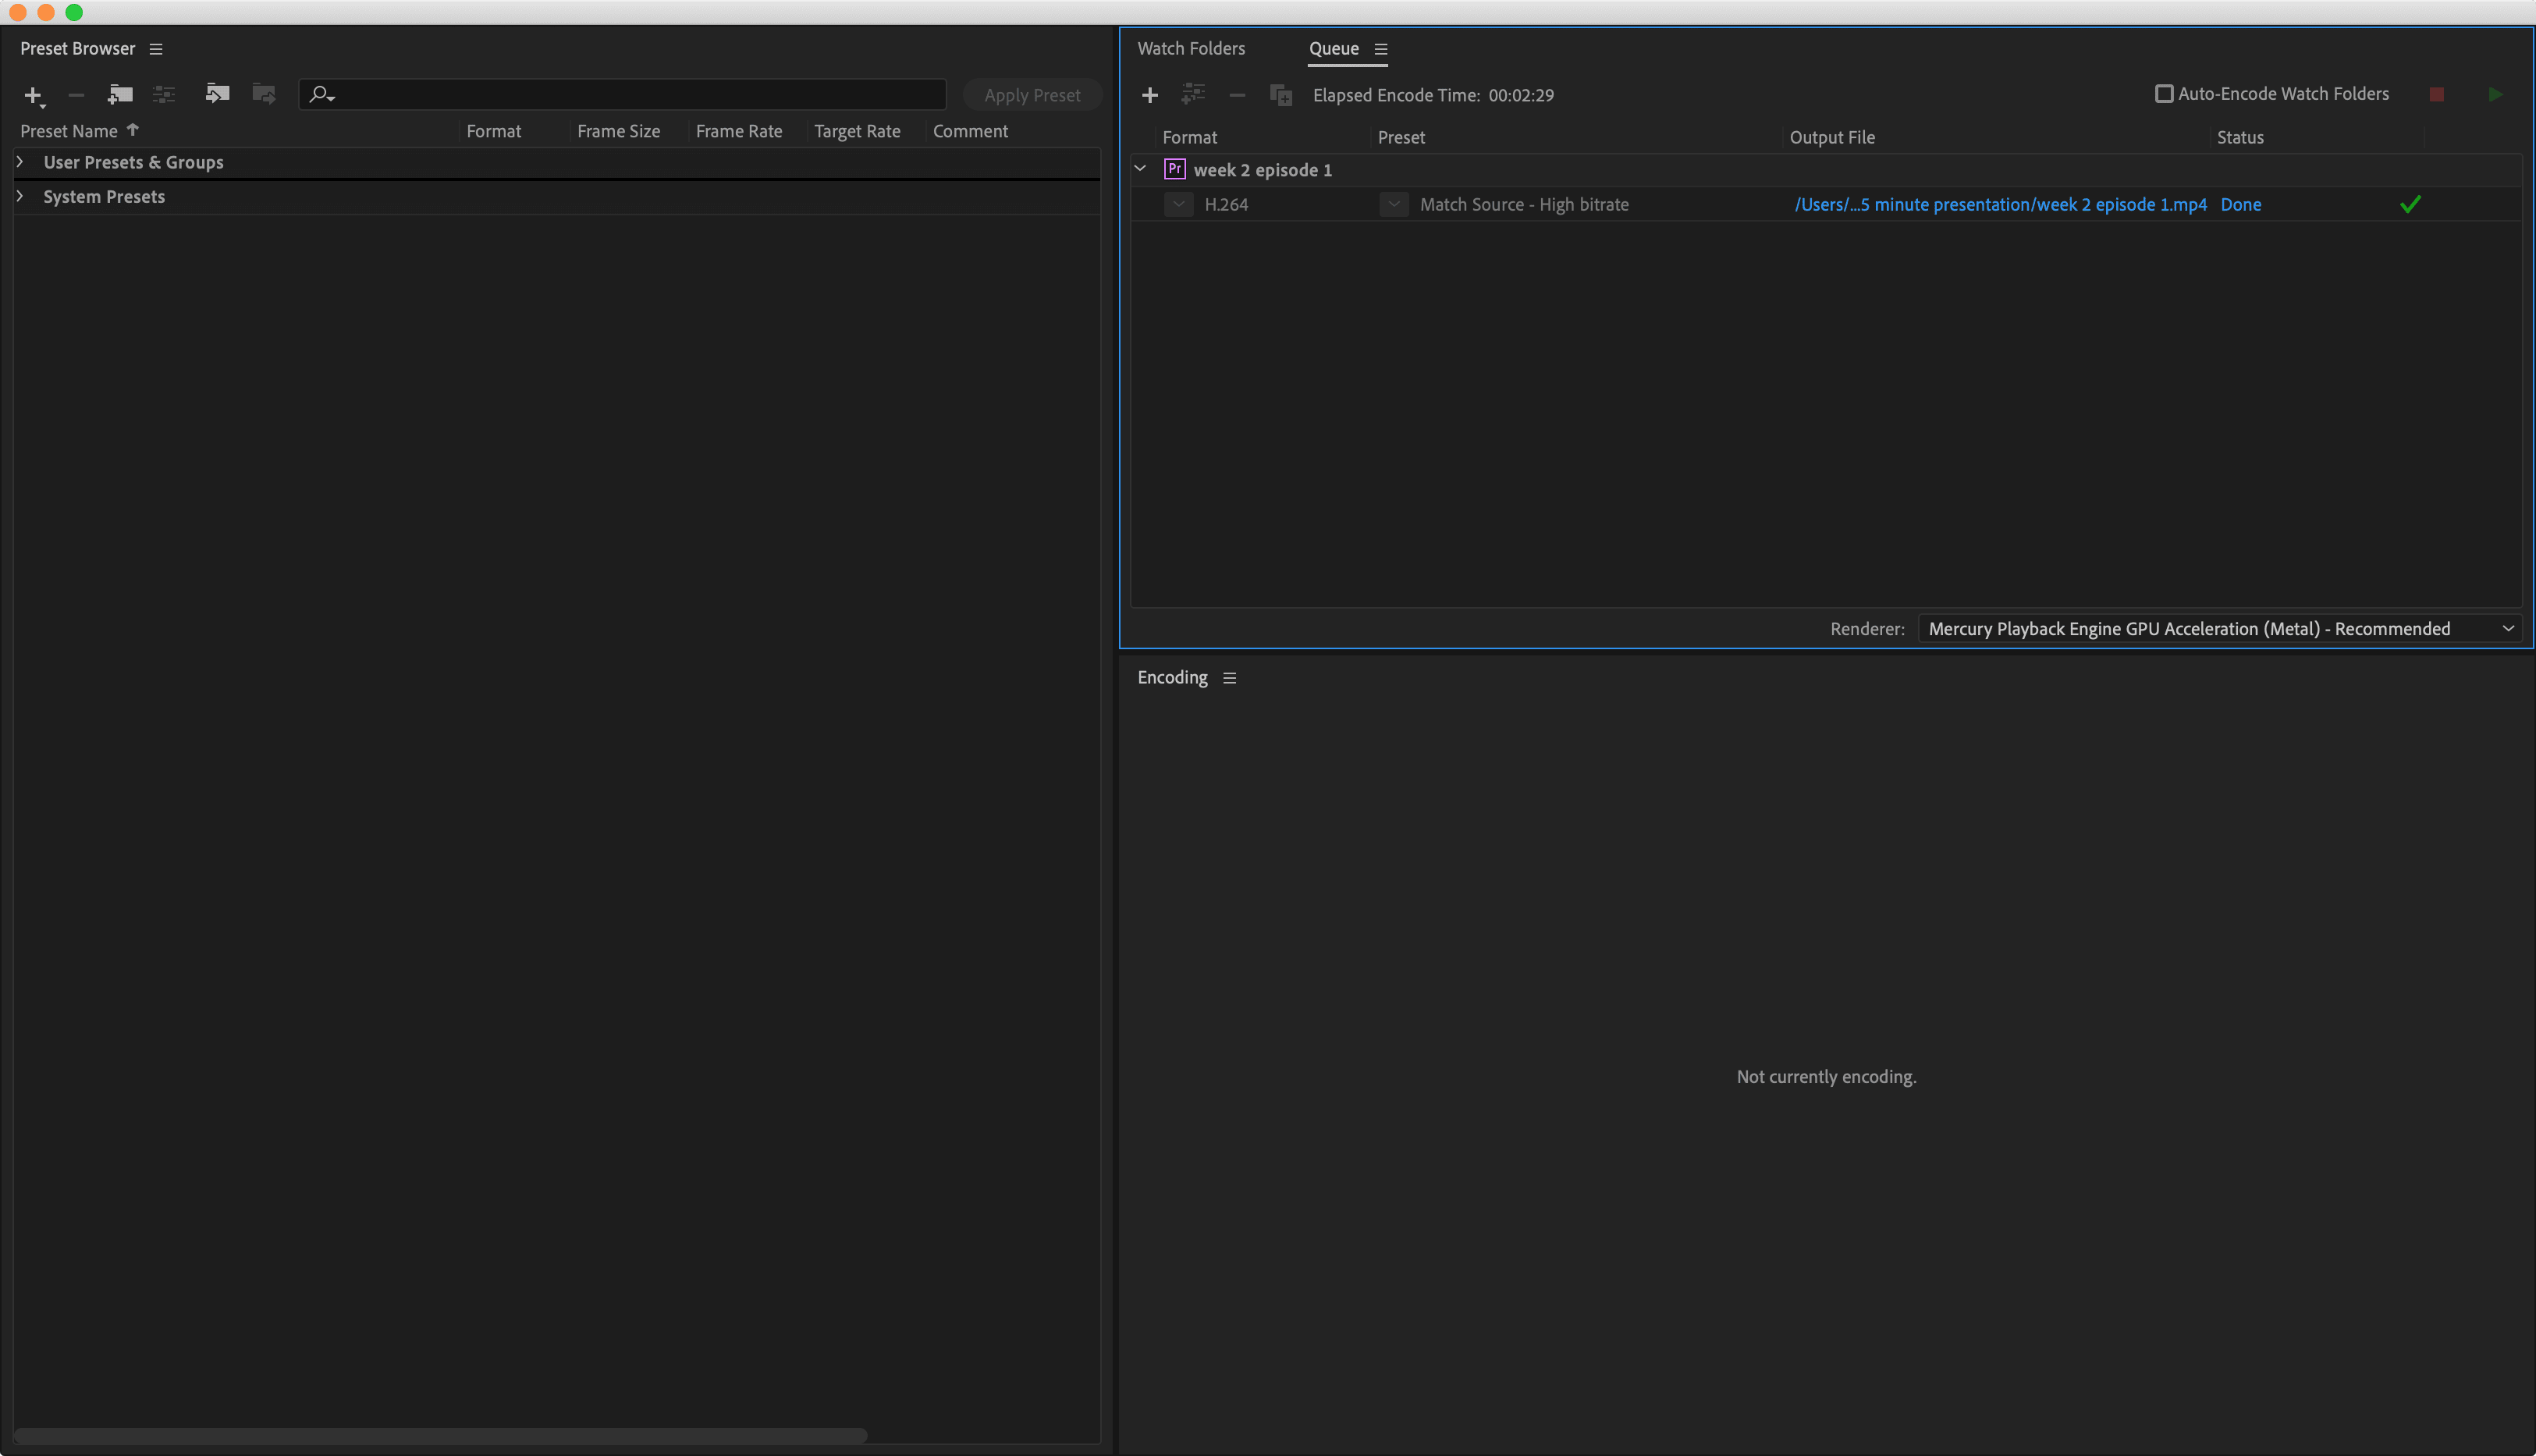
- Now, just wait for your video to export…

- And…done! You can find and watch your video wherever you exported it.
)
DaVinci Resolve
Instructions for this programme coming soon. :)